Trekking tips for beginners – because there's more to it than just common sense
Jun 5, 2025
We've got great tips for beginner trekkers in this post. These are tips around planning, your physical prep, your clothing and gear, actually walking the trail, and also trekking etiquette. It's everything you need to know to become a seasoned trekker!
byPaul Kelly
Jun 5, 2025
26 min read
Trekking in the wilderness – where you're far from the noises of the city and the demands of daily life – is one of the best experiences you'll ever have. Trekking broadens your horizons and challenges you, not only physically but in other ways too, as it often takes you out of your comfort zone.
We highly recommend giving trekking a go, but we also recommend you ease your way into it safely and sensibly. With this in mind, we present you with our top trekking tips for beginners!
At Follow Alice, we lead treks in some of the most beautiful spots in the world!
Planning
Planning involves considering things like where and when you'll go trekking. Follow our tips below, and you'll discover this isn't really a daunting task at all.
1. Pick an introductory route
What we mean by 'introductory route' is a route that's reasonably easy and not too long.
Your early treks should be about getting familiar with long-distance, multiday hiking (i.e. trekking!). Focus on building your strength, getting used to your pack, and learning what to pack (and what to leave at home).
Here are a few specific pointers in terms of landing on an introductory trek:
Choose a route with minimal elevation gain, which is to say one that’s reasonably flat so you don’t freak out your body and mind by tackling something overwhelming.
Don’t go for a route that takes you into extreme weather – not only will this require possibly very expensive equipment that you don’t yet have, but it will also tax you physically and mentally in a way that you should perhaps build towards.
Don’t go for extreme terrain, like a very rocky path or one with tons of scree. Also, consider avoiding snow and ice, which might necessitate bringing crampons. Build up your ankle strength and confidence by tackling a relatively smooth and dry path.
Picking a manageable trek route increases the chances you'll feel like smiling in photos!
2. Choose your season carefully
Trekking often takes you into extreme terrain, such as mountainous territory with frigid nights, or deserts with fierce winds and intense heat, or regions that receive monsoon rains. So you need to do your research before choosing when in the year to go to locations like this.
Often, winter isn’t the best time, but it all depends on where in the world you are. In some places, spring means a miserable world of flies, midges and other critters. So yes, research is essential. (Alternatively, check with the tour operator you plan to use for their advice on the best season for the trek.)
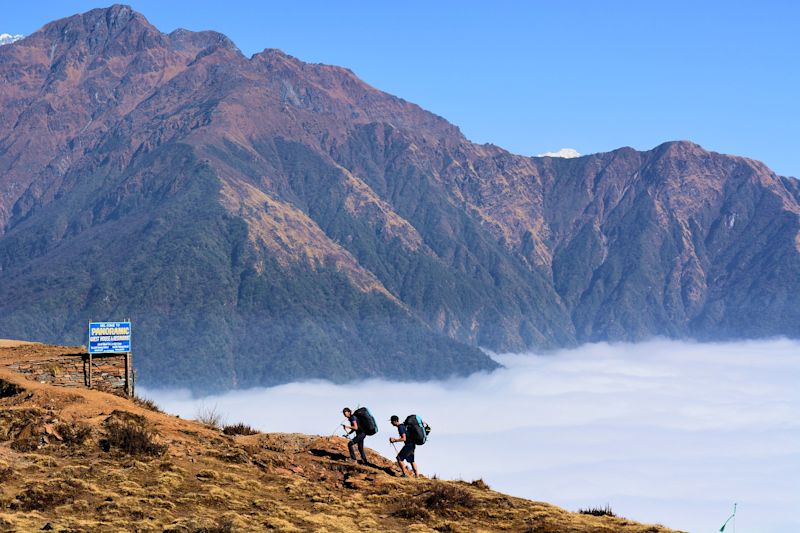
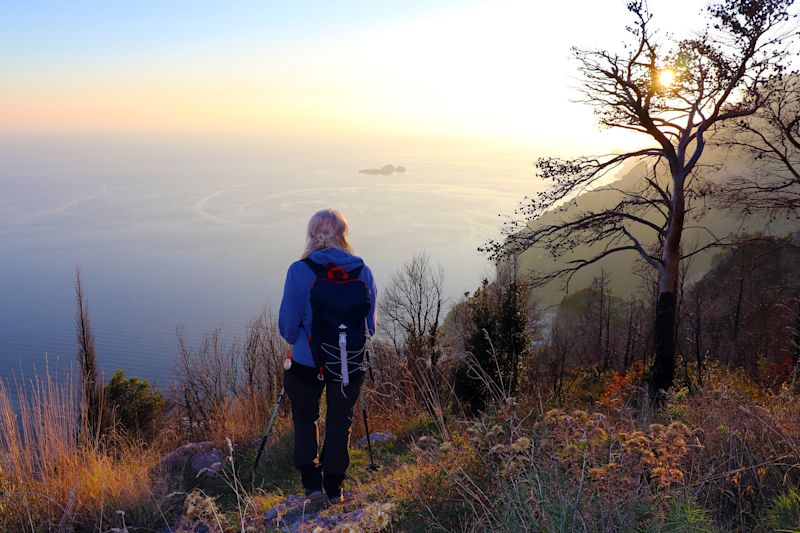
Depending on the route, mist can be just mist, or it can become dangerous fog
Firstly, you want to choose a safe season in terms of things like blizzards, thick fogs or possible landslides from water-clogged ground. Not only could such seasonal hazards make your trek unsafe, they could also lead to authorities closing certain paths or parks, which can derail your entire trip.
Check the weather forecast just before heading out.
Trekking often takes you into remote places with little or no cellphone connectivity, few to no people, and few to no services. So if you come across trouble of any sort, help isn’t nearby. This means you need to be sensible – choose a safe season and head out only if the weather forecast is amenable.
Research any water crossings
Some treks involve a river crossing or two. If it’s a tidal river, then you might well need to cross at low tide, or things could get very wet, even rather hairy. So you may well need to set your starting time for the day in accordance with when you need to arrive at the river for the crossing.
You must research the trail conditions of the season when you'll be trekking
3. Tell someone when and where you’re going
Someone outside of the trekking party must know exactly when and where you’re trekking.
Often, a trekking register is imposed on you, whether you like it or not, by park authorities, who make you sign the park register. At other times, the onus is on you to ensure you sign the mountain register. Never, ever forget to do this, as this is what’s used by authorities to assess if anyone is missing and send out a search party.
If you’re trekking in unmonitored wilderness, it’s even more vital that you let someone know exactly where you’re going. But we don’t recommend heading into such terrain as a novice. Better that you stick to a well-marked trail in a properly monitored park or reserve.
Linked to this is the necessity of sticking to the stated itinerary and trail. This isn’t your daily jog where a spontaneous detour along that intriguing footpath to the left is a good idea.
Satellite phones for the win
If you head off on a trail with a proper trek guide, then the tour company should know exactly where you will be at any given time. Furthermore, your guide should be equipped with a satellite phone so that help can be obtained even when there's no mobile phone service. Check with your operator that this is the case before heading out together.
4. Try slackpacking before trekking with a rucksack
We recommend that your first few treks be slackpacking adventures. This means you carry just a daypack and have someone else transport the bulk of your belongings. This could mean using the services of a porter, or having someone drive and drop off your belongings ahead of you at the next accommodation.
Carrying a heavy rucksack filled with your clothes, food, cooking equipment, and camping materials just makes your trek that much harder and more daunting. You want to ease yourself into trekking, not be whacked over the head with the practicalities, rigour and expense of doing it all yourself.
Don't shy away from using the services of a porter
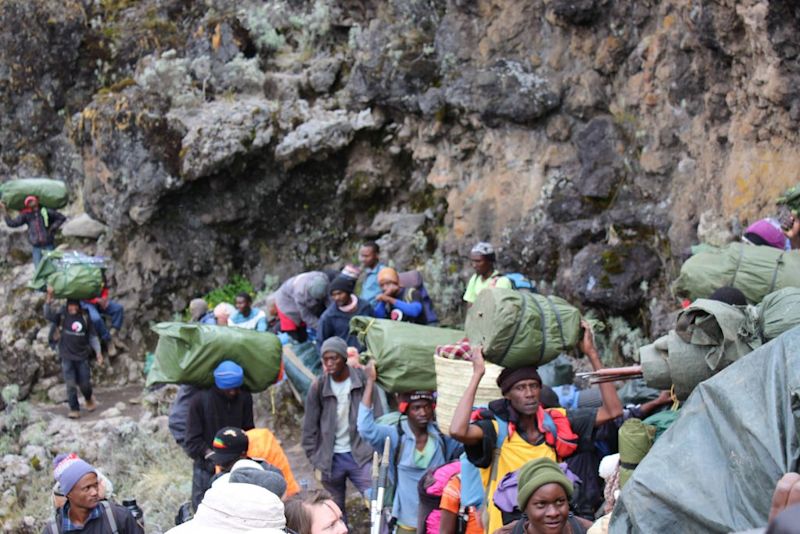
Porters are common along many trekking routes around the world. We highly recommend using a porter if one is available. Porters literally take a load off of you, which, as a beginner trekker, is a massive help and also can allow you to tackle a more exciting trek route.
In addition to being a physical help, porterage is an important means of employment in many popular trekking regions.
When trekking in Nepal, for instance, porters are standard practice. Sometimes they carry your packs themselves, and sometimes they make use of pack animals like yaks.
When you climb Mt Kilimanjaro, you have no choice but to use porters. This is partly because no one person can carry all that they need, given that even drinking water for the week must be carried with you. Another reason is that it’s mandated by the Kilimanjaro National Park Authority.
On Kilimanjaro, porters are an essential service
5. Research national and park permits
Most parks and reserves require you to pay an entry fee of some sort. Some countries also require travellers to pay a fee. The important thing is to do your homework and know what costs to expect. Also, find out if these must be paid beforehand or in person, and if you need to pay in cash.
Most large parks require you to obtain a permit or pay an entrance fee
One of the perks of going on a trek with a reputable tour operator is that they deal with such details and admin for you. At Follow Alice, for instance, we work all necessary park and government fees and permits into our tour package price. This way, you don’t have to worry about any surprise costs. We also acquire the permits on your behalf to save you the extra admin.
6. Choose your fellow trekkers carefully
Going on a trek with experienced trekkers is a great plus, as you can look to them for guidance in both the planning and execution of the trip. Obviously don’t go on a trek with that cousin who thinks everything is a competition. Rathe,r choose people, if possible, who will be encouraging and patient with you.
If you go with a company, research them well. Are they experienced in leading trekking tours? Is the trek guide trained in first aid? A good idea is to read independent reviews of the company before choosing them.
Try to pick companions who'll be supportive of you as a beginner trekker
7. Make a checklist
Every seasoned trekker has a checklist they work through diligently before heading off on a trek.
A good checklist should include a to-do list as well as a packing list. The to-do list includes items like checking on park permits and looking up the weather forecast. Your packing list should include every little item that foes into your toiletries bag.
You’ll add to and improve your checklist with time.
Physical preparation
Naturally, the fitter and stronger you are, the easier any trek will be.
If you’re taking on your first multiday trek, then we highly recommend putting in some focused physical training beforehand. Trekking involves challenges beyond just physical endurance, so the more you can reduce the physical challenge, the better. You’ll then be able to focus your energies on any other challenges that arise, as well as on simply enjoying the experience.
8. Do some preparation hikes
Trekking requires strength and stamina. Naturally, the best physical preparation for trekking is doing exactly what you’ll be doing on the trek itself: hiking. If you can do some preparation hikes in the lead up to your trek, you’ll be doing yourself a world of service.
As much as you can, walk the same sort of terrain in your prep hikes that you’ll cover on the trek itself. Also, try to walk the same number of hours that you’re likely to cover on the average trek day.
Ideally, start your preparation hikes at least two months before the trek.
9. Train with your backpack
Your preparation hikes should ideally mimic the trekking conditions as much as possible. This means things like wearing the backpack you’ll be using on the trek.
Even better, fill the backpack with the items you’ll be taking on the trek. In this way, you’ll not only get used to the weight of it all, but you’ll also quickly discern if anything is unnecessary, or there’s something you’re missing. Further to this, you’ll be able to determine if your backpack is comfortable and suited to the task.
Look for a rucksack or backpack with wide shoulder straps as these distribute the weight better. You don’t want thin straps digging into your shoulders as you trek.
You also want padded hip belts, especially with a rucksack. These let you carry some of the weight on your hips – an absolute must!
We also recommend using a backpack with multiple compartments besides the main bin. This makes it easier to store and find things. When it comes to the pack's fabric, polyester or very strong nylon works well. You should also look for a pack that has a netted back panel, as this allows your body heat to escape. (Learn more in How to choose a backpack for trekking.)
It's only after many consecutive hours with your backpack that you know if it's truly comfy
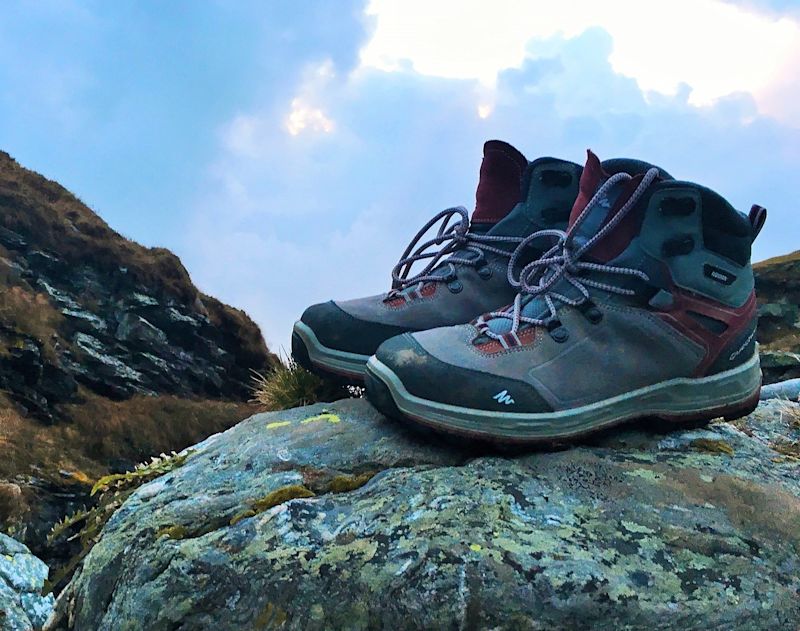
10. Train in your hiking boots
Similarly, you want to train in the boots and socks you’ll be wearing on the trek.
Just as with your backpack, this is about checking that everything is comfortable and suitable. For instance, finding out on a low-stakes hike that your sock seam is uncomfortable or that your boots are sponges is far better than discovering the same on the trek when there’s nothing you can do about it.
Train in the shoes you'll wear on the trek to ensure they're comfortable and suitable
If you plan to buy new trekking boots, please do so thoughtfully. For starters, wear your intended hiking socks when trying on the boots. Leaving the laces untied, push your feet as far forward as they’ll go. Then insert an index finger between your heel and the back of the boot. You want your finger to fit in snugly (too much space and the shoe is too big, too little space and the shoe is too small).
Walk around in the shoes a little, or even step onto a treadmill if possible to try them out properly.
About 60% of people have differently sized feet, so always try on both the left and right boots.
Speaking of mimicking the trek conditions, try to fit in some back-to-back hiking days as part of your physical prep. Consecutive days of trekking can place strain on the body. So you want to build up your body’s strength and stamina in this regard. You also want to teach yourself that you're capable, so that a positive mindset kicks in on the trek when the going gets tough.
Clothing and gear
Let's now discuss the items that need to go on the trek with you ...
12. Wear broken-in shoes and socks
Hiking boots are generally better than hiking shoes, as the former offer more ankle support and also have thicker tread and a more durable fabrication.
That said, depending on the terrain you’ll be trekking in, hiking shoes might be sufficient.
As to socks, ensure you have ones warm enough for the climate in which you’ll be trekking.
You might also like to consider wearing sock liners or two pairs of socks at once to help reduce the chances of blistering. If you do develop a hotspot, always deal with it immediately. Don't wait until it's a full-blown blister before doing something about it!
As discussed in Tip #10, you want to do your trek wearing socks and shoes that you already know to be comfortable on long hikes. A good rule of thumb for breaking in hiking shoes is to traverse 100 km in them before the two of you head off on a big trek.
13. Bring gaiters
A gaiter is a lower leg covering that extends over the top of your shoes and then ends somewhere below your knee. They can be made from various fabrics, though a popular choice is a waterproof gaiter.
Wearing gaiters on a trek has a few benefits, like:
Keeping dirt and small stones out of your socks and shoes.
Keeping water and mud at bay (if waterproof).
Protecting you from cuts and rashes caused by thorns, serrated plants and other nasties.
Protecting you from snake bites.
If you’re worried about snakes, try to remember this saying: “First one wakes it. Second one annoys it. Third one gets it.” So it’s best to not walk third in line. 😃
14. Pack waterproof gear
We’ve mentioned waterproof gaiters, but of course, no trekker should head out of the gate without a few other waterproof essentials, namely a rain jacket, waterproof overpants, and a backpack cover.
A rain jacket that doubles as a windbreaker can be a great asset. Note that you can also buy a waterproof backpack.
Ideally, your hiking boots should be waterproof as well. If not, try to ensure they’re at least water-resistant.
You really want waterproof gear to avoid a miserable trek
15. Wear layers
When trekking, you want to layer your clothes. This is partly for warmth and comfort, partly so you can strip or add layers piecemeal. The layers you need are as follows:
An inner layer (think thermal long-sleeved vest and leggings in cold climates)
A middle layer (this would be your shirt and shorts, or trousers)
An outer layer (like a fleece jacket, beanie and gloves)
A waterproof layer
The specifics of your layers depend greatly on the climate where you’ll be trekking. The clothing requirements for a snowy trek in the mountains are, naturally, far different from those of a warm coastal trek and will involve a further layer on both your legs and your top half.
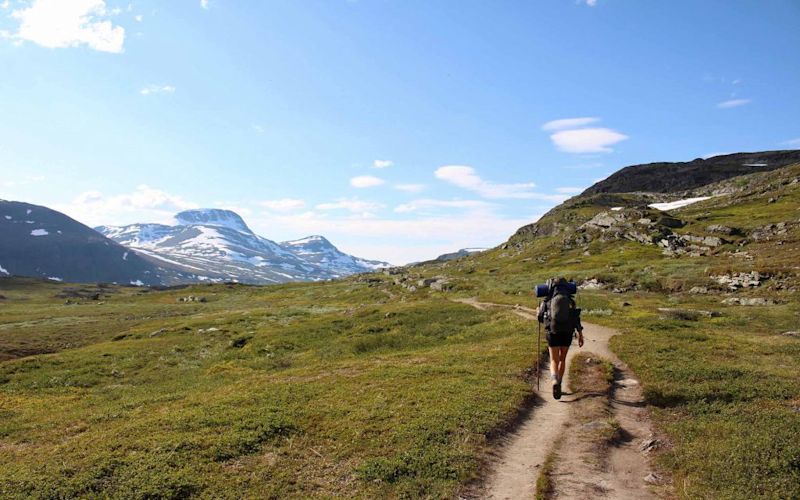
16. Pack light
Whether the bulk of your belongings are to be carried by you or a porter, you want to keep things to a minimum and pack light. Don’t skimp on essentials, but also accept that you won’t be wearing a fresh set of clothing every day.
Certain items, like a fleece jacket, will do hard duty and be smelly at the end of the trek - don’t fret about it, everyone smells on treks. Depending on the location and weather, you might be able to wash a shirt or similar in the shower or a river, then strap it onto the back of your backpack to dry as you walk the next day.
Other essential items might include medications, toiletries and high-energy snacks (unless these can be bought along the trail).
Don't stuff your backpack full, or you'll soon feel the burden of the weight
If you're doing a trek with a tour operator, you should be given a full packing list tailored to that trek.
Walking the trail
You might think trekking is just about putting one foot in front of another. What else is there possibly to know?
Well, yes, at its most basic, trekking is just walking. But there’s also a little more to it. Here are a handful of tips that can make the act of trekking that much safer, easier and kinder to your body.
17. Get an early start
It’s best to start your day’s trek early. It’s decidedly un-fun worrying that you won’t make your destination before darkness falls.
As a beginner trekker, aim to walk for no more than six hours per day. You don’t want to push yourself too hard.
18. Take a 5- to 10-minute break every hour
It’s important to take regular rests. This applies to beginner trekkers just as much as seasoned ones.
Remember that trekking is a marathon, not a race. You’re in it for the overall experience, so take things slowly and rest often.
Also, trekking is a team effort, so you should endeavour to go at the pace of the slowest person. Don’t be the person who sets off after a rest break the moment the slowest soul catches up!
Regular rest stops are a must – not just for the body, but also for taking in the view!
19. Take long strides on flats, short steps on hills
There will be times on a trek when the going is easy, and you trot along happily, thinking little about what you’re doing. Wonderful! But for those times when the going is tough and fatigue is setting in, you’d do well to employ a little strategy in your steps.
When walking along a flat route, try to extend your stride just a little. It also helps to swing your arms a little more determinedly, elbows bent.
On ascents and descents, shorten your steps a little. This will reduce the impact of the step on the downhill, and reduce your fatigue on the uphill. Also, try to use both legs when making bug uphill steps rather than overtaxing one leg in particular.
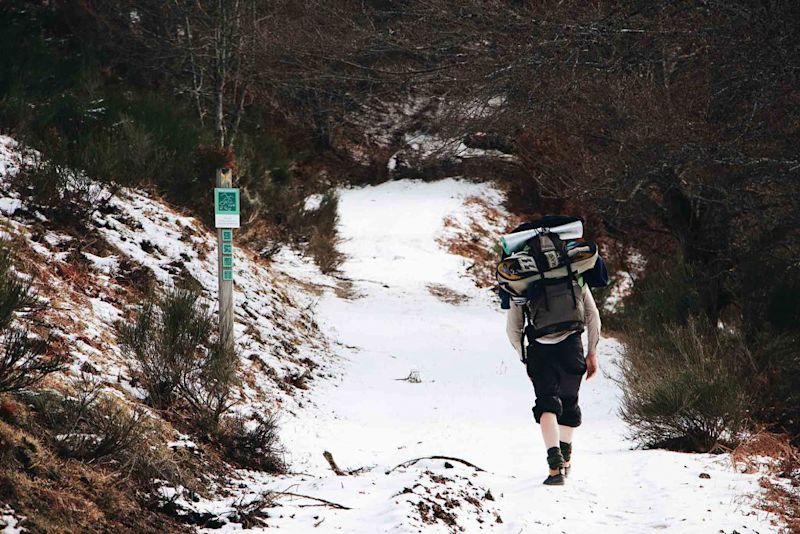
20. Wear your pack correctly
Don’t risk short- or long-term discomfort (or even injury) by wearing your backpack or rucksack incorrectly. If you have waist straps, which a good pack should have, then ensure they’re sitting on your hips properly to take some of the load off your shoulders.
You also need to ensure the contents in your pack or rucksack are evenly distributed, so you’re not lopsided. You also don’t want the pack pulling you backwards, so pack heavier items at the bottom.
The guy in the purple hoodie has a backpack that's hanging a bit too low
21. Try using trekking poles
Trekking poles are great at helping you stabilise yourself on uneven terrain. They also help cushion the impact on your knees on steep or long descents. (They’re not intended for hooking the backpack in front of you when you’re struggling to get the person’s attention.)
If you already have ski poles, you can use these instead of forking out for trekking poles. That said, one of the nice things about quality trekking poles is that they can be collapsed for easy storage, and can also be lengthened or shortened to suit your frame or the terrain.
Trekking poles offer a few benefits, including taking a little strain off your legs on downhills
It’s important to protect your eyes and skin while trekking.
For your eyes, this means wearing sunglasses with UVA and UVB protection. This is especially important when trekking near water (to avoid the glare) or in snow (to avoid snow blindness – a real thing!).
Protect your skin by covering up, wearing a sun hat or cap with a wide brim, and using a sunscreen with a high SPF factor.
It's important to protect your eyes and skin, especially on high-altitude treks
Remember that the higher the elevation, the stronger the solar rays. So even if you’re bundled up against the cold and snow on a high-altitude trek with only your nose and cheeks exposed, that very same nose and cheeks are in danger of being burned.
A spray sunscreen is often the easiest option as it can be reapplied without needing to first clean your hands.
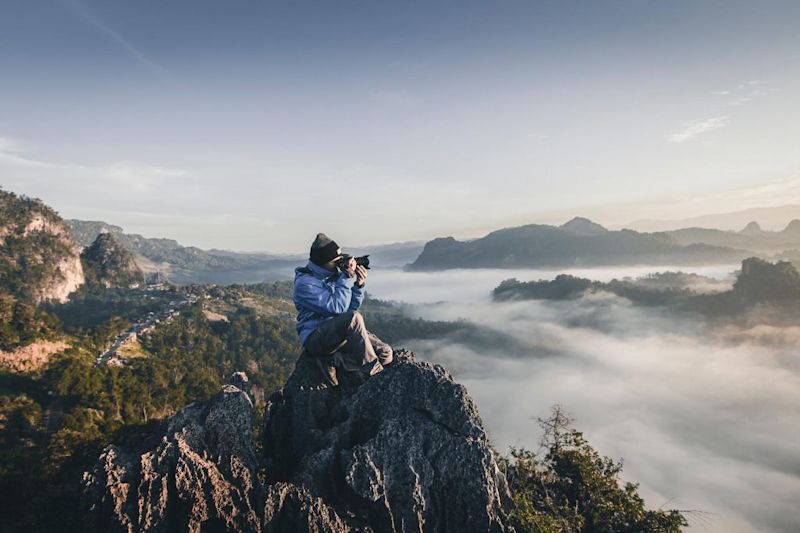
23. Bring your camera
Obviously you want to capture some of the beauty and special moments of the trek. So don’t forget your camera.
Our advice is to consider assigning one person in your trekking group to take pics. There’s no need for five cameras to emerge when you spot a duiker in the clearing – why not let the most skilled photographer among you capture the sight and share it with you later, allowing the rest of you just stay present in the moment? (We offer similar tips in Mindful travel: 14 ways to have a more meaningful trip.)
You might like to consider having just one person in the group take pa hoto on the trek
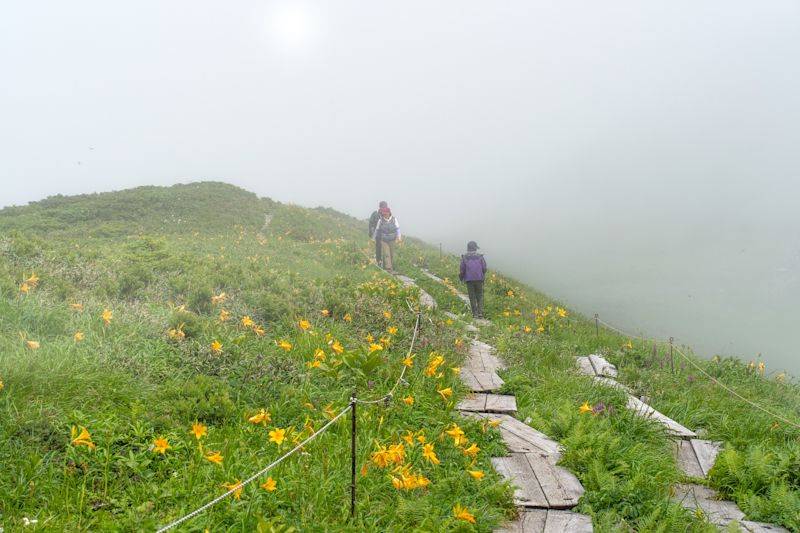
24. Stick to the path
It’s important to stick to the marked trail when trekking. Not only should you do this as a safety precaution, but also for the sake of conservation. Stepping off the trail could harm fragile flora and a delicate ecosystem. We want to keep our literal human footprints to a minimum! (Learn more in 7 ways to reduce your eco footprint when trekking.)
You also want to stick to the trail from a safety point of view. Firstly, stepping off the trail increases your chances of twisting an ankle or falling, as you might not see clearly where your foot will fall. Grass and vegetation can mask holes, exposed roots and more.
Secondly, and more importantly, wandering off the trail jeopardises your safety. There might be literal and figurative pitfalls just off the pathway. Also, if mist or fog descends, you might struggle to find your way back to the route. Finally, if a rescue team has to be sent out for you, they can’t be guaranteed of finding you if you’ve left the trail.
Exception: Going to the loo
When you’re out in nature and nature calls, you usually have to step off the path to find a quiet, concealed spot. Try to go 50 m or more away from the trail, and be sure to bury any waste. Carrying a small trowel might be a good idea for certain treks. Do your best when navigating your loo run to step on as few plants as possible.
Sticking to the trail has a few benefits, including protecting the ecosystem
25. Don't step on fallen trees, logs or rocks
Whenever possible, you should step over obstacles in your path rather than on them.
Have you seen Happiness for Beginners on Netflix? Here, the character Hugh walks along a fallen tree trunk only to have the rotting wood give way and knock him out, while also injuring his leg badly. Don't be a Hugh.
As to logs that clearly aren't rotting, they could still roll underfoot. And if it's not necessary to step on a rock, then that's great, as that rock could also shift underfoot and cause an accident.
That said, you also want (as much as possible) to first look to see where you're putting your foot before actually making the step. This is because there may be a snake or other creature that won't take kindly to you treading on them.
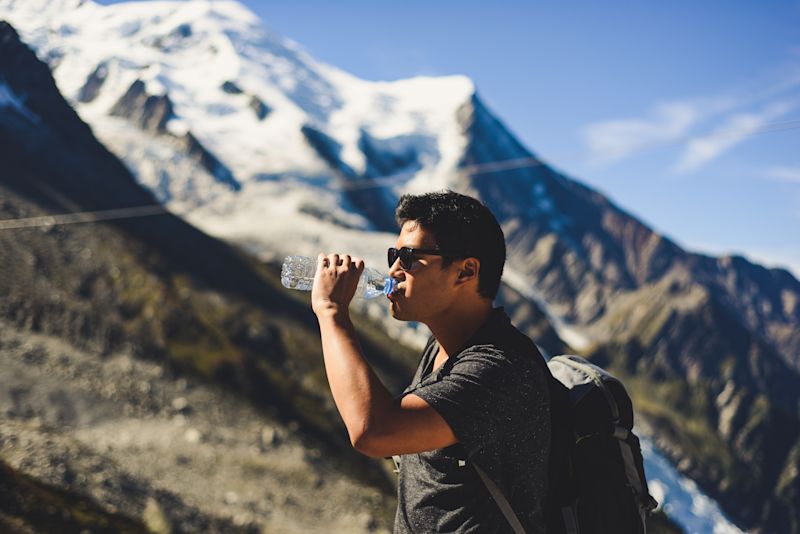
26. Stay hydrated
Staying well hydrated means ensuring you’re getting plenty of H₂0 as well as enough electrolytes. You can be chugging endless amounts of water on a strenuous trek, and yet still end up emptying the contents of your stomach after strenuous exercise because your electrolytes are too low. Remember that pretty picture as motivation to plan your source of electrolytes for your next trek!
Electrolytes can be found in coconut water, fruit juice, sports drinks, and even tablets.
Note that it's especially important to drink plenty of water on high-altitude treks as it helps to lessen the symptoms of mild altitude sickness.
Drinking water helps to mitigate the symptoms of altitude sickness
Finally, remember that if you’re thirsty, you’re already hydrated. So drink little sips often. A hydration pack with a drinking hose is useful here so that you don’t have to reach for your water bottle every time you want a sip.
Bring water purification tablets
Depending on where your trek takes place, water purification tablets might be necessary. They don’t taste great, but diarrhoea isn’t a treat either. Just add an electrolyte sachet to your water source to mask the taste of the purification tablet.
27. Eat nutritious food
Obviously it’s important to eat healthy and nutritious food during treks to provide your body with the fuel it needs to keep going.
What some of you might not know, however, is that nutritious food is doubly important on high-altitude treks to help keep the symptoms of altitude sickness at bay. So while a chocolate bar can be a great pick-me-up when your legs are tiring, the main part of your diet on a trek should be nourishing, whole foods.
Do your best to eat nutritious food even if the high altitude has reduced your appetite
Trekking etiquette
Whether doing a short hike or a multiday trek, certain universal rules or etiquette apply on the trail. These exist to both protect the natural environment and make the trail enjoyable for everyone. Many are just good common-sense stuff!
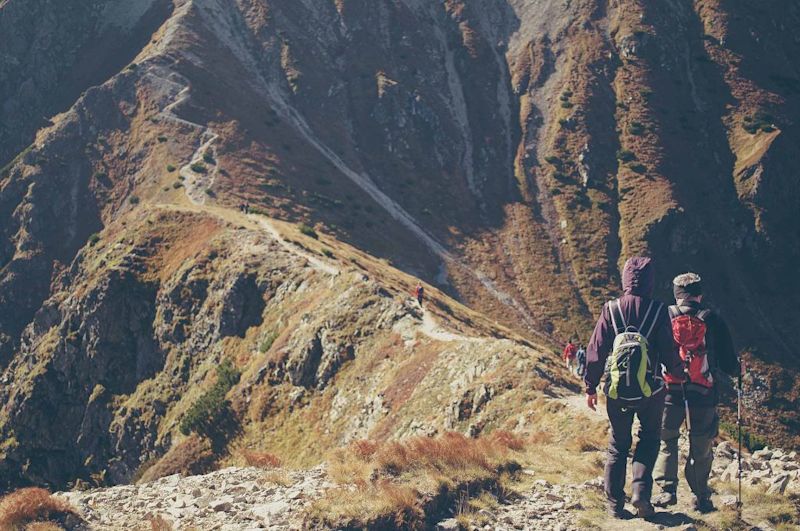
28. Walk in a single file
Generally speaking, you should walk in a single file on a trek. If the path is very wide, walk side by side. But on narrow footpaths, the etiquette is to walk in a single file.
29. Give way to uphill climbers
If the path is a narrow one (and arguably all the best ones are!), then you might need to step aside or just off the path when you encounter foot traffic. (Yes, this is another exception to the stick-to-the-path rule.)
Note that uphill climbers should always be given the right of way on trails. If there are mountain bikers and horse riders on the path too, they also have the right of way.
Uphill is tough, so we give way to those tackling the incline
30. Don’t speak too loudly
It’s safe to assume that all other trekkers on the trail are there to enjoy the sights and sounds of nature. Trekking is a great time for reflection, for some solitude, and for benefiting from being in the outdoors. So don’t talk loudly. Also, your hilarious anecdote could scare off the wildlife.
31. No music except through headphones
If you must bring music on a trek, it should only ever be listened to through earphones. This goes for campsites too.
Again, assume everyone else on the trek wants to hear the sounds of nature.
It’s also better from a safety point of view to be alert to all noises, so no music at all is best. (That said, a little sing-along if there’s no other party on the trail can be fun at times.)
32. Never, ever litter
This one doesn’t need explaining, at least we hope!
When trekking in remote parts where there are no bins (trash cans), you should always carry out what you take in, so carry some refuse bags for storing waste. Depending on the nature of the item, you could possibly bury it in the ground inside a biodegradable bag. But this depends on the area and the ecosystem, and often this won't be allowed.
Be sure to familiarise yourself with the specifics of the country, reserve or park where you’re trekking before heading out on the trail so that you know what actions to take or avoid, and also have the necessary equipment to abide by the rules.
33. Don’t pick wildflowers or feed wild animals
Again, this is pretty basic stuff. No matter how cute the monkeys, rabbits, deer or whatever – don’t mess with their natural habits and digestive systems by feeding them.
Instead, be content to coo over them from a distance, snap a photo (without flash – you don’t want to scare them), and then let them be.
And as pretty as that hibiscus might look tucked in your ponytail, refrain from picking the flora. A trekker should aim to impact the environment as little as possible, thereby preserving it for everyone else as well as for the sake of the ecosystem.
Never feed wild animals, no matter how ridiculously cute they are!
Ready, set … let’s trek!
At Follow Alice, we offer a handful of epic trekking adventures.
All of these treks are high-altitude treks, which means they take place at great elevation. High-altitude treks are particularly challenging because the reduced oxygen levels make breathing and exercise that much harder. But high-altitude treks are also incredibly rewarding, as the scenery and sense of accomplishment tend to be second to none!
We have a wealth of information about trekking these trails to help you learn more about them and the challenges involved. If you’d like to learn more, a good starting point might be one of the following blog posts: