


Why trekking poles deserve a standing ovation
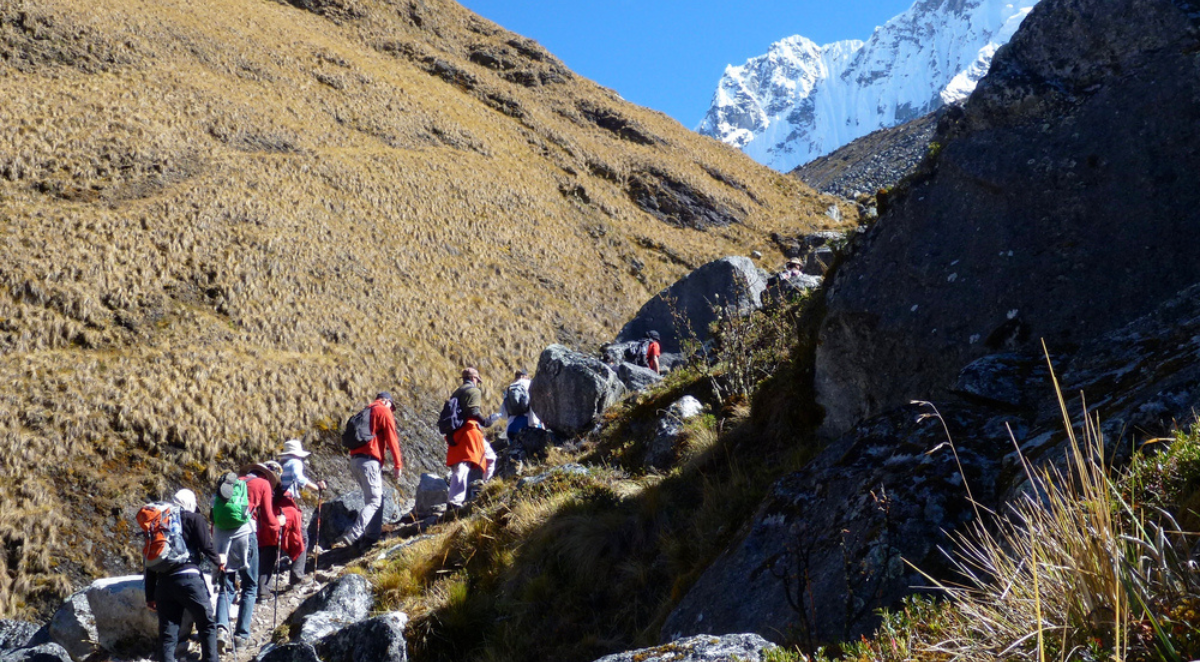
Whether you’re climbing the Annapurna Circuit or conquering Everest Base Camp, trekking poles for hiking can totally transform how your body handles the trail. They’re not just for seasoned mountaineers or grandparents power-walking through parks — they’re a game-changer for hikers of all levels who want to hike smarter, go farther, and recover faster.
Here’s why learning how to use trekking poles correctly might be the smartest upgrade you make to your hiking setup:
They save your joints
Each downhill step slams force through your knees. Using trekking poles distributes that impact and eases the pressure. In fact, studies show that trekking poles can reduce knee strain by up to 25% (PubMed). That’s a big deal on steep descents or rugged terrain.
- Especially helpful on rocky, uneven, or high-altitude trails
- Minimises post-hike soreness and injury risk
- Think of them as shock absorbers for your legs
They improve balance and posture
River crossings, loose scree, snowfields — all easier with poles. Trekking poles act like a second set of limbs, helping you stay upright when things get sketchy.
- More stability in dicey terrain
- Keeps your posture aligned so you can breathe deeper
- Helps prevent awkward stumbles that lead to sprains
Bonus: You won’t have to crab-walk downhill anymore.
They give your arms a job
Your arms aren’t just hanging around for decoration. With trekking poles, your upper body gets involved — which takes the pressure off your legs and spreads the workload evenly. It;
- Boosts stamina, especially on long treks
- Helps tone your arms while you hike
- Encourages a natural walking rhythm and flow
Once you know how to use trekking poles properly, you’ll wonder how you ever hiked without them.

What are trekking poles, anyway?
Trekking poles (not to be confused with ski poles or wizard staffs) are lightweight, adjustable hiking tools designed to support your body and improve efficiency on the trail.
Key components of modern trekking poles
Want even more customisation? Look into trekking pole accessories like camera mounts, shock absorbers, or interchangeable baskets for snow and sand.
Trekking poles vs. hiking staffs
While the terms get thrown around interchangeably, they’re not quite the same.
If you want to cover varied terrain or hike long distances, trekking poles for hiking are usually the better choice.
Walking with poles: how to use trekking poles correctly
Using trekking poles should feel like a natural extension of your body—not a clumsy afterthought or hiker cosplay. Once adjusted to the right height, learning how to use trekking poles properly adds rhythm to your stride, supports your joints, and turns tough terrain into manageable ground.
Feeling a little robotic at first? Totally normal. With a bit of practice, your poles will sync with your steps like you’ve been hiking with them your whole life.
If you’re just dragging them behind you or poking the dirt at random, you’re not getting much out of your poles. Here's how to use them like a pro — and unlock their full potential.
1. Mastering your rhythm on flat terrain
How to use trekking poles on level ground
Here’s where the magic starts. When walking on flat trails, trekking poles for hiking aren’t just about support—they help maintain a smooth, full-body rhythm.
Step-by-step technique for flat trails:
- Move opposite limbs together: right pole with left foot, left pole with right foot.
- Let your shoulders—not your elbows—guide the movement. Keep it relaxed and flowing.
- Plant the pole just before your heel strikes. You should feel like the pole is helping your forward motion, not interrupting it.
This technique reduces energy waste and boosts efficiency, especially over long distances.
2. The double pole plant: your secret weapon
When to use it:
- Steep inclines
- Slippery slabs of granite
- Crossing rivers or loose scree
How it works:
- Plant both poles firmly in front of you.
- Shift your weight forward and push down as you step up or over.
- Repeat as needed—it’s like a mini power boost for tough sections.
No need for Olympic-level coordination—just plant, push, and move.
3. Adjusting pole height (no, don’t eyeball it)
Getting the right length is an important step in figuring out how to use a trekking pole correctly.
Use this simple formula: Elbows at a 90-degree angle when the tips touch the ground.
Ideal pole lengths by terrain
- Flat ground → Elbows at 90°
- Uphill → Shorten by 5–10 cm (2–4 in)
- Downhill → Lengthen by 5–10 cm (2–4 in)
Pro tip: Most poles have length markings — use them to dial in fast.
4. Using wrist straps the right way
Straps help you use the poles with less hand fatigue — if you use them correctly.
Step-by-step guide to proper strap technique
- Slide your hand up through the strap from below
- Grip the pole over the strap — the strap should rest between your palm and the grip
- Let the strap support your wrist so you don’t have to squeeze the grip constantly
Never wrap the strap tightly around your wrist. If you fall, that’s a recipe for injury.
Most common trekking pole mistakes (and how to fix them)
Mistake #1: Using poles that are the wrong length
If your elbows aren’t close to a 90-degree bend, you're making it harder on your body. Too long or too short, and your shoulders and arms will bear the brunt—especially on descents.
Mistake #2: Gripping too tightly
Tight grips = tired hands and gnarly blisters. Loosen up and let the wrist straps carry some of the load. If your forearms are burning after a few miles, it's time to dial it back.
Mistake #3: Not using poles on descents
How to use trekking poles correctly means keeping them in play on the downhills, not just the climbs. This is where your knees will thank you most. Stashing them away during descents is like packing up your parachute mid-jump.
Troubleshooting: common trekking pole problems
Even the best poles occasionally throw tantrums. Here’s how to fix the most common issues with trekking poles for hiking.
Pole slips mid-hike
- Cause: Worn locking system
- Fix: Tighten internal bolts or upgrade to a lever-lock model
Wrist strap rubbing or irritation
- Cause: Strap entered incorrectly or too tight
- Fix: Thread your hand from below, then adjust to a snug (but not tight) fit
Stuck or jammed adjustment
- Cause: Dirt or water in the lock
- Fix: Rinse thoroughly, dry completely, and apply graphite powder (never use oil—it attracts gunk)
Terrain tactics: how to use a trekking pole correctly in different conditions
Every trail throws a different challenge at you—your poles are the Swiss Army knives of hiking gear. Here’s how to fine-tune your approach based on terrain:
1. How to use trekking poles uphill
Climbing steep trails? Don’t just lean in and hope for the best—get your poles involved.
Key tactics for ascending:
- Shorten your poles by 5–10 cm. This gives your arms more power without overreaching.
- Plant poles slightly behind you. Push off with each stride like you're skiing uphill.
- Stay tall. Leaning too far forward collapses your posture and restricts breathing.
- Watch pole placement. Aim for solid ground, not loose dirt or crumbly scree.
When you use your poles effectively uphill, you’ll spread the workload across your whole body—not just your quads.
2. How to use trekking poles on downhill terrain
Heading downhill is where how to use trekking poles properly really matters. It’s about control, not speed.
Best practices for descending:
- Lengthen your poles by 5–10 cm. This lets you plant ahead for balance and shock absorption.
- Use your wrist straps. Let them support the motion so your grip stays relaxed.
- Keep your weight slightly forward. Don’t lean back—it throws you off balance.
For steeper sections, try the “step-slide-plant” technique:
- Plant both poles a step ahead.
- Step down with one foot.
- Slide the other forward.
- Repeat in a smooth rhythm.
This method helps you control the descent while saving your knees from absorbing every jolt.
3. Navigating tricky terrain with trekking poles
Uneven terrain is where trekking poles really shine. Whether it’s rocky ledges, muddy crossings, or steep stone staircases, here’s how to move with confidence:
For stairs and rocky trails:
- Use the double pole plant again for stability.
- Always plant the poles on the next step before you move your feet.
- Keep your centre of gravity low—think smooth and steady, not fast and frantic.
For river crossings and muddy patches:
- Spread your poles wider for a stable base.
- Probe the ground ahead to check for depth or soft spots.
- Use your poles like a tripod—two poles plus one foot = more stability.
Pro tip: Swap to rubber trekking pole accessories (tips) for slick surfaces like wet wood or smooth rock. They grip better and reduce slipping without damaging the trail.
How to use trekking poles (and the accessories that actually matter)
Trekking poles do way more than just make you look like a seasoned hiker (though they help with that, too). Here’s a no-fluff breakdown of trekking pole accessories that are worth packing—and how to use them properly.
Interchangeable tips: the unsung heroes of trail traction
Your pole tips take the most abuse. Swapping them out depending on the surface helps you hike more efficiently—and stay upright. Here's how to use each tip like a pro.
Tip types and when to use them
Pro tip: Carry extras
Tips wear down over time. They can also pop off mid-hike (usually at the worst moment). Toss a spare pair in your pack—you’ll thank yourself on mile 12.
Baskets: yes, those little rings actually do something
Wondering what those odd plastic rings near the tips are for? Trekking baskets prevent your poles from sinking too deep into soft surfaces. But they're not one-size-fits-all.
Basket types and best use cases
Skip big baskets on rocky trails
Large baskets can snag between rocks and roots. If you’re hiking in dry, uneven terrain, go minimal.
Pole storage: keeping your gear (and trail buddies) safe
Ever smacked someone in the leg with a loose pole? We have. Not ideal.
Must-have accessories for storage
- Pole clips to secure folded poles to your pack
- Protective sleeves to prevent scratches during transport
- Quick-deploy locks for rapid setup when terrain changes quickly
How to pack poles mid-hike
- Collapse or fold them
- Strap them vertically to the side of your pack
- Keep tips down, handles up
- Use Velcro ties or built-in straps if available
How to travel with trekking poles (especially on flights)
If you’re flying to a hiking destination, here’s how to use trekking poles without upsetting TSA or damaging your gear.
Carry-on or checked?
- Under 60 cm? You can usually bring them as a carry-on
- Longer than that? Pack them in checked baggage
Extra travel tips
- Remove the sharp tips (or cover with rubber caps)
- Wrap them in soft gear or bubble wrap to protect the locking mechanism
- Never store them wet—mildew and corrosion are real
Pro tips from hikers who live with poles
We asked thru-hikers, mountain guides, and backpacking fanatics how to use trekking poles correctly—and what they wish more people knew.
1. Use one pole when scrambling
Sometimes, you need a free hand to grab a boulder or brace a fall. Collapse one pole, keep the other for light balance, and stay agile.
2. Colour-code your poles
Add coloured tape or paint a ring on the right pole grip. It’s especially helpful when you’re wearing gloves and fumbling with wrist straps in the cold.
3. Trust your body over measurements
Don’t get too hung up on centimetre markings. If your posture feels solid and your movement is fluid, you’re likely using your trekking poles properly—and that’s what really counts.
Bonus: Are trekking poles really worth it?
If you’re still wondering whether trekking poles are worth the space in your pack, here’s what you’re actually gaining — or giving up — on the trail:
So yes, they’re far from just “nice to have.” When used correctly, trekking poles for hiking can completely change how you move through tough terrain.
Where to buy trekking poles (without getting junk)
If you're ready to gear up, here are a few shops that consistently deliver — no weird knockoffs, no hassle returns.
1. REI Expert help. Top brands. A great place to test before you buy, especially if you're picky about grip or weight.
2. Amazon Huge selection and plenty of real reviews. Just double-check the specs — not everything’s trail-ready.
3. Backcountry Leans premium. If you're after ultralight or carbon fibre trekking poles, start here.
4. LEKI Solid gear, good prices, and their sales hit often. Worth checking before you hit “buy.”
5. L.L.Bean Great if you’re just starting out. Their poles last, and the return policy is legendary.
Decent poles don’t need to break the bank — just make sure you’re buying from folks who know hiking.
Take your trekking pole skills to the trail
Once you learn how to use trekking poles properly, they become more than just gear. They're tools for efficiency, balance, and rhythm — and on certain hikes, they can even mean the difference between finishing strong or turning back early.
And no, you don’t need to be a mountaineer to benefit from them. Anyone hiking on uneven trails, logging long distances, or carrying a heavy pack will immediately feel the difference.
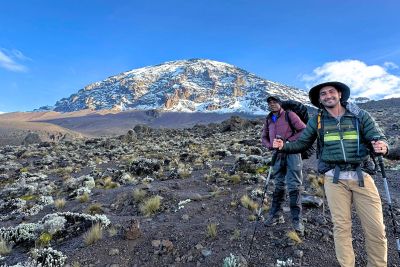
Curious about where to test your technique? Put your skills to the test on real trails. Check out our guides to climbing Kilimanjaro and trekking Mount Meru — both are incredible challenges where knowing how to use trekking poles correctly really pays off.