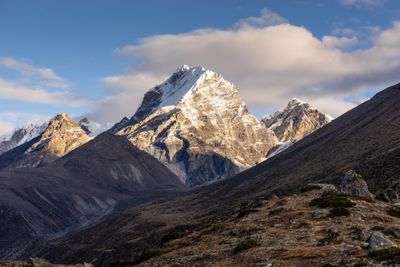


Island Peak, known locally as Imja Tse, towers at 6,189 meters (20,305.12 ft.) in the heart of Nepal’s Khumbu region. Tucked behind the dramatic ridges of Ama Dablam and not far from Everest itself, this peak offers something most treks can't: a real taste of Himalayan mountaineering.
For many, climbing Island Peak in Nepal is the perfect next step after reaching Everest Base Camp. You’re not just walking into the clouds—you’re stepping into the world of ropes, crampons, and alpine summits. This is where high-altitude trekking meets real-deal mountaineering.
Island Peak: where it is, and why it matters
In 1953, the British Everest expedition nicknamed it “Island Peak” because it looked like a lone island rising from a frozen sea of ice. The official name is Imja Tse, but pretty much everyone still calls it Island Peak—and once you see it, you will too.
The mountain rises from the southern ridge of Lhotse, making it part of the same dramatic chain that shapes the skyline near Everest. It’s long been used as a training ground for climbers heading to 7,000- and 8,000-meter giants.
But don’t think it’s just a practice climb. The Island Peak Nepal climb is an achievement in its own right—physically demanding, technically engaging, and visually mind-blowing.
Why climb Island Peak?
Because it’s not just another uphill slog—it’s a gateway to real mountaineering. When you climb Island Peak, you're not just trekking anymore. You’ll rope up on a glacier, tackle a 100-meter headwall with fixed lines, and climb steep snow slopes with an ice axe in hand. This is your chance to experience mountaineering without jumping straight into technical expeditions or ultra-high altitudes.
And then there’s the view from the summit.
- On clear days, Lhotse towers above you.
- Makalu looms in the distance
- Ama Dablam shows off its jagged ridges
- Even Nuptse peeks into frame.
It’s one of the few summits below 7,000 meters that delivers this kind of alpine panorama.
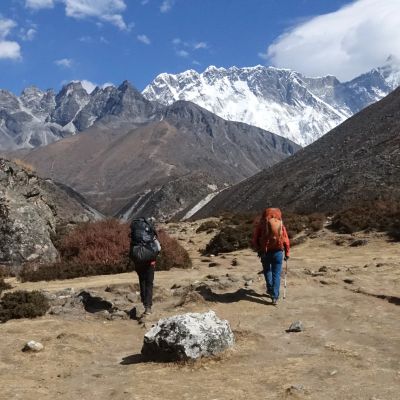
But the climb is just part of the story. You'll hike through Sherpa villages like Namche Bazaar and Pangboche, cross swaying suspension bridges, spin prayer wheels outside ancient monasteries, and spot yaks carrying gear along narrow trails.
Island Peak climbing in Nepal is as much about the cultural journey as the summit push.
What to expect on the climb
Your Island Peak climb in Nepal starts with a thrill right out of the gate:
- Fly into Lukla – That cliffside runway? It’s real. Welcome to the Himalayas.
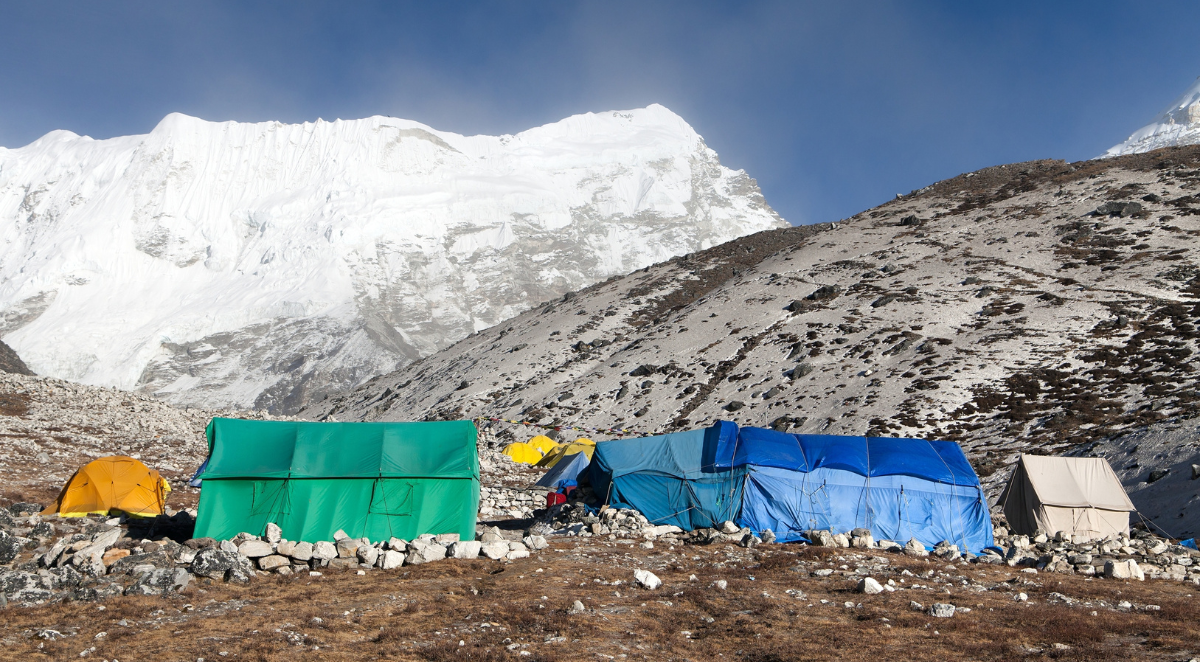
- Trek the Everest Base Camp trail – Pass through Phakding and Namche as you gain altitude slowly (and let your body adjust).
- Break off at Chukhung – This is where you leave the Everest crowd and head toward Island Peak Base Camp.
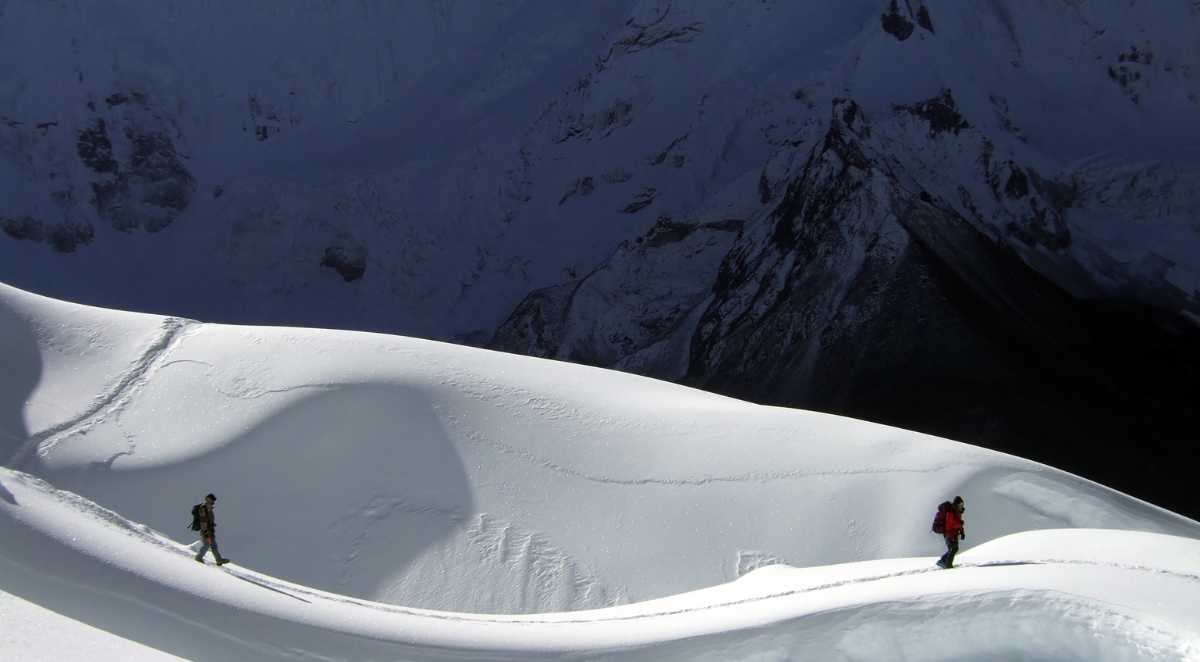
Then comes summit day. It’s not a hike—it’s a full alpine push:
- Start early (around 1 AM) – You’ll be climbing under headlamp light.
- Scramble over rock – The terrain starts off uneven and steep.
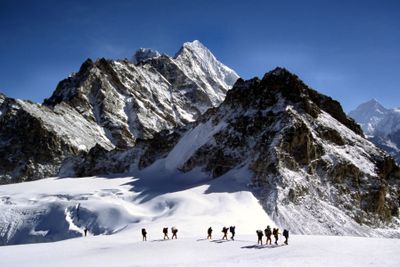
- Rope up on the Imja Glacier – This section can be icy and exposed, but manageable with your guide.
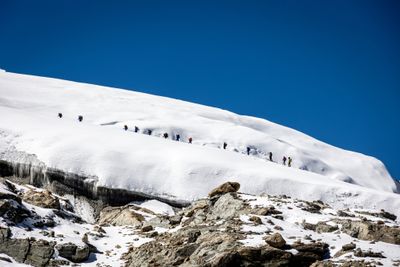
- Climb the 100-meter ice wall – Steep, fixed ropes, crampons—this is where it feels like real mountaineering.
- Reach the summit ridge – Narrow but stable. Views? Unreal.
If you’re dreaming of the Himalayas but not ready for Everest, climbing Island Peak is the perfect way in. It’s high-altitude, technical, and unforgettable—without the 8,000-meter commitment.
Summit highlights
At 6,189 meters, the reward is indescribable.
You’ll be surrounded by giants — Lhotse, Makalu, Baruntse, Ama Dablam, and even the south face of Everest. If the skies are clear, sunrise hits the snow peaks like fire. And the wind? It might be strong enough to rip your gloves off.
But for most, the real prize is personal — that moment of stillness, knowing you actually did it. You climb Island Peak once, but it stays with you forever.
When’s the best time to climb Island Peak?
Choosing the right season to climb Island Peak in Nepal can be the difference between a summit and a weather-forced retreat. The Himalayas are stunning—but they’re also wildly unpredictable.
Best seasons for Island Peak climbing in Nepal
1. Spring (Late March–Early June):
- Most stable weather window
- Longer daylight hours
- Popular among trekkers heading to Everest Base Camp
2. Autumn (Mid-September–Early November):
- Crisp, clear skies after the monsoon
- Fewer crowds on the trail
- Cooler temperatures, especially at night
Times to avoid
- Monsoon (June–August): Trails are muddy, flights get delayed, and visibility is poor.
- Winter (December–February): High winds, bone-chilling cold, and increased avalanche risk make climbing extremely challenging.
Aim for spring or autumn to maximise your shot at a safe and successful Island Peak summit.
Training for Island Peak
Island Peak isn’t Everest—but you can’t fake your way up it either. You’ll need solid cardio, strong legs, and comfort on mixed terrain. The good news? You don’t need to be a seasoned mountaineer. Many people climb Island Peak as their introduction to alpine climbing.
What matters most is your ability to move steadily for hours with a pack—at altitude.
How to train
A smart training plan focuses on endurance, strength, and mobility. Here's how to get started:
- Endurance – Go for long hikes with a loaded pack, run trails, or cycle regularly. Aim for 4–5 days a week.
- Strength training – Build up your legs, glutes, core, and shoulders with squats, lunges, deadlifts, and weighted step-ups.
- Flexibility and balance – Yoga or dynamic stretching will help you avoid injury and stay agile on uneven ground.
Why cardio matters most
At 6,000+ meters, the biggest enemy is thin air. When you climb Island Peak Nepal-style, you’ll spend days above 5,000 meters, where every breath gets harder. Strong cardiovascular fitness means better oxygen efficiency, less fatigue, and a lower risk of altitude sickness.
If your lungs and legs are ready, you’ll not only summit—you’ll enjoy the climb too.
How fit do you need to be to climb Island Peak?
Island Peak is labelled a “trekking peak,” but don’t let that fool you—it’s physically and mentally demanding. The summit stands at 6,189 m (20,305 ft), and getting there requires more than just good hiking boots.
Physical conditioning required
You should be able to:
- Trek 6–8 hours daily for over two weeks
- Carry a 10–15 lb pack at high altitude
- Handle steep, technical terrain while roped in
- Use a jumar, walk on fixed lines, and wear crampons with confidence
How to train before the climb
- Cardio: Trail running, stair climbing, long hikes
- Strength: Focus on legs, core, and grip strength
- Altitude: Train at elevation if possible—or simulate with a hypoxic mask
- Practice: Weekend hikes with a weighted backpack
The biggest asset? Mental toughness. Fatigue, cold, and fear of exposure can knock the wind out of even the strongest athletes. Be ready to push through.
The climbing route
The journey begins with a scenic flight from Kathmandu to Lukla, followed by a classic Khumbu Valley trek. This route mirrors the Everest Base Camp trail for the first part, taking you through bustling Sherpa villages, ancient monasteries, and high-altitude valleys.
Gradual acclimatisation is built into the itinerary to help you adjust to the altitude and improve your chances of summit success.
Island Peak Nepal Expedition: Itinerary Overview
Acclimatisation processes
Getting to the top of Island Peak isn’t just about strength — it’s about patience. Acclimatisation is what separates those who summit safely from those who don’t.
Your itinerary is built around this. That means slow altitude gains, rest days in key spots, and lots of time for your body to adjust. No shortcuts here.
But it’s not just about altitude milestones. You’ll need to:
- Stay very hydrated — think 4 to 5 liters a day.
- Eat well, even when your appetite disappears.
- Watch for the early signs of altitude sickness — and act fast.
The better you acclimatise, the better your chances when it’s time to climb Island Peak Nepal.
Understanding altitude sickness
Island Peak sits deep in the "very high altitude" zone, where oxygen levels are about 50% of what you're used to. Symptoms can sneak up on you, and fast.
Here’s what to watch for:
- Headaches that don’t go away
- Nausea or vomiting
- Fatigue or unusual weakness
- Dizziness or lightheadedness
- Loss of appetite
These aren’t badges of honour. If your symptoms worsen or don’t fade after rest, descend immediately. No summit is worth the risk.
Prevention tips
To avoid AMS (Acute Mountain Sickness), follow these basics:
- Stick to your acclimatisation schedule, no exceptions
- Hydrate constantly (yes, that means frequent toilet stops)
- Skip alcohol and limit caffeine
- Eat even when you don’t feel like it
- Tell your guide if anything feels off
Some trekkers choose to take Diamox (acetazolamide), a medication that helps the body acclimatise faster. But it's not a replacement for altitude sense — and always consult your doctor first.
Emergency protocols
If you or someone in your group develops HAPE or HACE (the serious forms of altitude illness), immediate descent is critical. No debate.
That’s why solid outfitters are equipped with:
- Portable oxygen tanks
- Satellite phones for rescue coordination
- Access to helicopter evacuation (only possible with pre-arranged insurance)
Climbing Island Peak without proper emergency planning is irresponsible. Full stop.
Importance of guided support
Why you need a climbing guide
Unless you’re an experienced alpinist with high-altitude glacier and rope skills, climbing Island Peak without a guide isn’t just risky — it’s dangerous.
A trained guide does a lot more than lead the way:
- Manages crevasse risk on the glacier
- Sets up and monitors the fixed lines on the headwall
- Makes split-second calls in bad weather or emergencies
- Keeps an eye on your health — even when you’re not
Plus, many are Sherpa — born and raised in the high Himalayas, with a deep understanding of the terrain and conditions.
Guide vs. porter vs. Sherpa
These roles often overlap, but here’s the basic breakdown:
- Guide: Responsible for your safety and success on the climb
- Sherpa: An ethnic group; many are guides or porters, with legendary altitude ability
- Porter: Carries gear but doesn’t guide or summit
Most reputable teams operate with a 1:2 or 1:4 guide-to-climber ratio, with additional porters for equipment. The right support team makes all the difference.
How to choose a good operator
Not all climbing outfits are created equal. When researching options for your Island Peak Nepal climb, ask:
- What’s their summit success rate?
- Are their guides IFMGA- or NMA-certified?
- Do they carry emergency oxygen?
- Are evacuations covered and explained clearly?
- What do past trekkers say on TripAdvisor or Bookatrekking?
Do your own due diligence. Ask questions. Read the fine print. You’re trusting people with your life.
Necessary communication gear
When you're deep in the Khumbu, your phone turns into a glorified camera. Cell signal is patchy at best, non-existent at worst. If you're going to climb Island Peak in Nepal, you need real communication tools—especially above base camp.
Must-have devices for the climb
- Satellite phone (Iridium or Thuraya): Critical for weather updates, emergency SOS signals, or letting folks back home know you made it.
- Two-way radios (walkie-talkies): Used by your climbing team to stay in touch between base camp, high camp, and the summit push.
- Garmin inReach or Spot X: Satellite messengers with real-time GPS tracking and built-in emergency contact functions. Some also allow basic texting.
Most Island Peak expeditions include this gear, but don’t assume—confirm with your trekking company before booking.
Required permits and paperwork
You can’t just roll into Chhukung, lace up your boots, and head up the mountain. To climb Island Peak, you need permits—no exceptions.
Permits needed to climb Island Peak in Nepal
- Island Peak climbing permit: Issued by the Nepal Mountaineering Association. Cost ranges from ~$70 to $250 USD depending on season.
- Sagarmatha National Park entry permit: About $30 USD. Required for anyone entering the park, even trekkers.
- Khumbu Pasang Lhamu Rural Municipality permit: ~$20–25 USD. Local government fee used for maintaining the region.
These documents must be in hand before your summit attempt. Your tour operator should sort them, but always double-check what’s included.
Where to get the permits
- Climbing permit: Arranged in Kathmandu by your guiding agency.
- National park + rural municipality permits: Usually secured in Lukla or Monjo as you begin your trek.
Guided Island Peak climbs typically include all necessary paperwork, but it’s worth confirming the fine print in your itinerary.
For more info on how to obtain an Island Peak climbing permit, click here.
What to pack for an Island Peak climb
Packing for a climb of Island Peak means being ready for sudden snow, high winds, and extreme temperature shifts—all while keeping your backpack light enough to haul for days.
Clothing essentials
- Waterproof hardshell (jacket + pants)
- Insulated down jacket (at least 600-fill)
- Fleece or synthetic mid-layer
- Merino wool base layers
- Warm gloves (liner + insulated mitts)
- UV-protective sunglasses
- Buff or balaclava
- Wool beanie + wide-brim sun hat
- B3-rated mountaineering boots (rigid soles for crampons)
Technical climbing gear
- Crampons
- Ice axe
- Climbing helmet
- Climbing harness (adjustable)
- Locking and non-locking carabiners
- Ascender (jumar) + descender (figure 8 or ATC)
- Prusik cords and climbing slings
Personal gear & extras
- Headlamp with extra batteries
- 3- to 4-season sleeping bag (rated to -20°C / -4°F)
- Trekking poles
- Reusable water bottles + purification tablets
- Energy snacks (gels, bars, trail mix)
- First aid kit + personal meds (especially altitude-related)
- Power bank and/or solar charger
- Dry bags for electronics and clothing
Most technical gear can be rented in Kathmandu or Namche. Guided climbs typically offer a checklist—compare it with this one to make sure you're covered.
Here is a complete packing list for Nepal Peak climbing.

Tips for first-time Himalayan climbers
Climbing Island Peak in Nepal is as much about smart choices as it is about fitness. The trail is unforgiving to those who underestimate it, especially first-timers. Here’s how to stack the odds in your favour:
- Respect acclimatisation days — Skipping them isn’t tough, it’s reckless. Altitude sickness is real, and prevention is far easier than rescue.
- Test your boots before the trek — Don’t wait until Chhukung to find out they rub.
- Carry cash — ATMs are rare, unreliable, or non-existent. You’ll need cash for tips, snacks, and last-minute gear.
- Watch your pack weight — Porters usually carry up to 15 kg per person. Overpacking slows you down and can cost extra.
- Let your team know about dietary restrictions — Vegetarian and vegan options exist, but guides need advance notice to plan accordingly.
- Wear a buff or mask — The dry, dusty air of the Khumbu can leave you with the dreaded “Khumbu cough.”
- Pack everything in dry sacks — Weather turns quickly up high, and when it does, everything you own will try to get wet.
Climbers who come prepared—mentally, physically, and logistically—are the ones who enjoy the journey. That includes those tackling Island Peak for the first time or using it as a stepping stone for bigger Himalayan objectives.
Why climb Island Peak?
Let’s get one thing straight: Island Peak isn’t Everest. And that’s exactly why it’s such a brilliant mountain to climb.
For anyone looking to climb Island Peak Nepal, it offers one of the most rewarding high-altitude experiences you can find without needing full-on expedition credentials. The Island Peak Nepal climb is challenging—expect steep ice walls, glacier travel, and thin air—but it’s also manageable for fit, well-prepared trekkers.
Whether you're using this climb as training for bigger peaks or ticking off a bucket list dream, Island Peak delivers. It’s wild, it’s high, and it demands everything you’ve got.
But the summit? It’s worth every single step.