


Shira route at a glance
The Shira route is just 56 km (35 miles) in total, making it the shortest of the seven Kilimanjaro ascent routes after the Umbwe route. It can be completed over six or seven days, with the longer itinerary giving an extra day for the ascent.
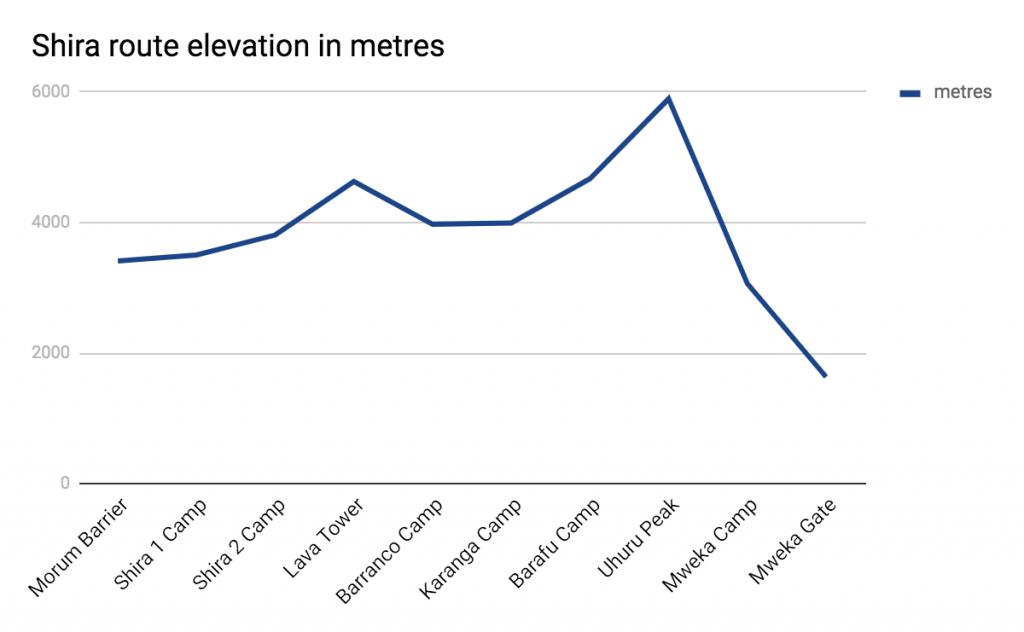
The Shira route starts at Morum Barrier (3,414 m), which is located on Shira Ridge on the western slope of Kilimanjaro. You first must cross the gorgeous Shira Plateau, which offers incredible panoramic views of the surrounding landscape. After passing the rocky monolith of Lava Tower on Day 3, the Shira route then follows a path known as the Southern Circuit, which traverses the ground below Kibo Peak's southern ice field. During this time you must climb the steep Barranco Wall.
You eventually reach Barafu Camp, which is one of two base camps located in the alpine desert zone of Kilimanjaro and to the east of its summit, Uhuru Peak (5,895 m).
After hopefully reaching Uhuru Peak on your summit push, you descend the mountain along its southeastern slope to finish at Mweka Gate (1,640 m). So there's no retracing your steps on the Shira route.
The Shira route is one of the least used Kilimanjaro routes. It starts out as a very quiet route. But when it links up with the popular Lemosho route at the end of Day 2, it becomes one of the busiest Kilimanjaro trails.
The Shira route is actually the Lemosho route's predecessor. The Lemosho is an updated and improved version of the Shira, in our opinion. Why do we say this? Well, the Shira route starts at a risky elevation: Morum Barrier sits at 3,414 m and anything above 3,000 m can be considered risky. The Lemosho, on the other hand, starts about a vertical kilometre lower than the Shira, and therefore offers its trekkers time for proper acclimatisation (acclimation).
Finally, please note that the Shira route requires you to camp, as there are no huts you can stay in, like on the Marangu route.
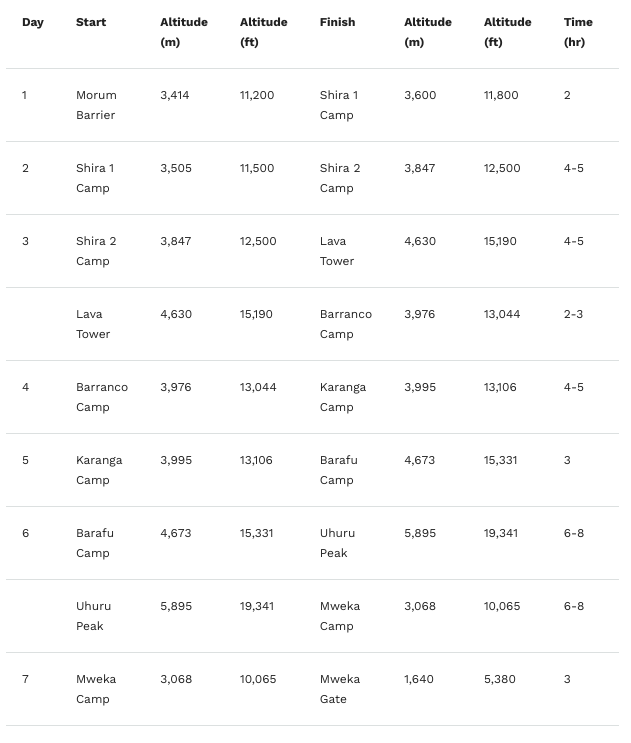
The table below shows you the itinerary for the seven-day version of the Shira, which we would always recommend over the six-day version.
The graph below shows the Shira route's elevation profile. Note that most Kilimanjaro routes start and end at a similar altitude; here you can see just how high the starting point of the Shira route actually is!
Detailed day-by-day route description
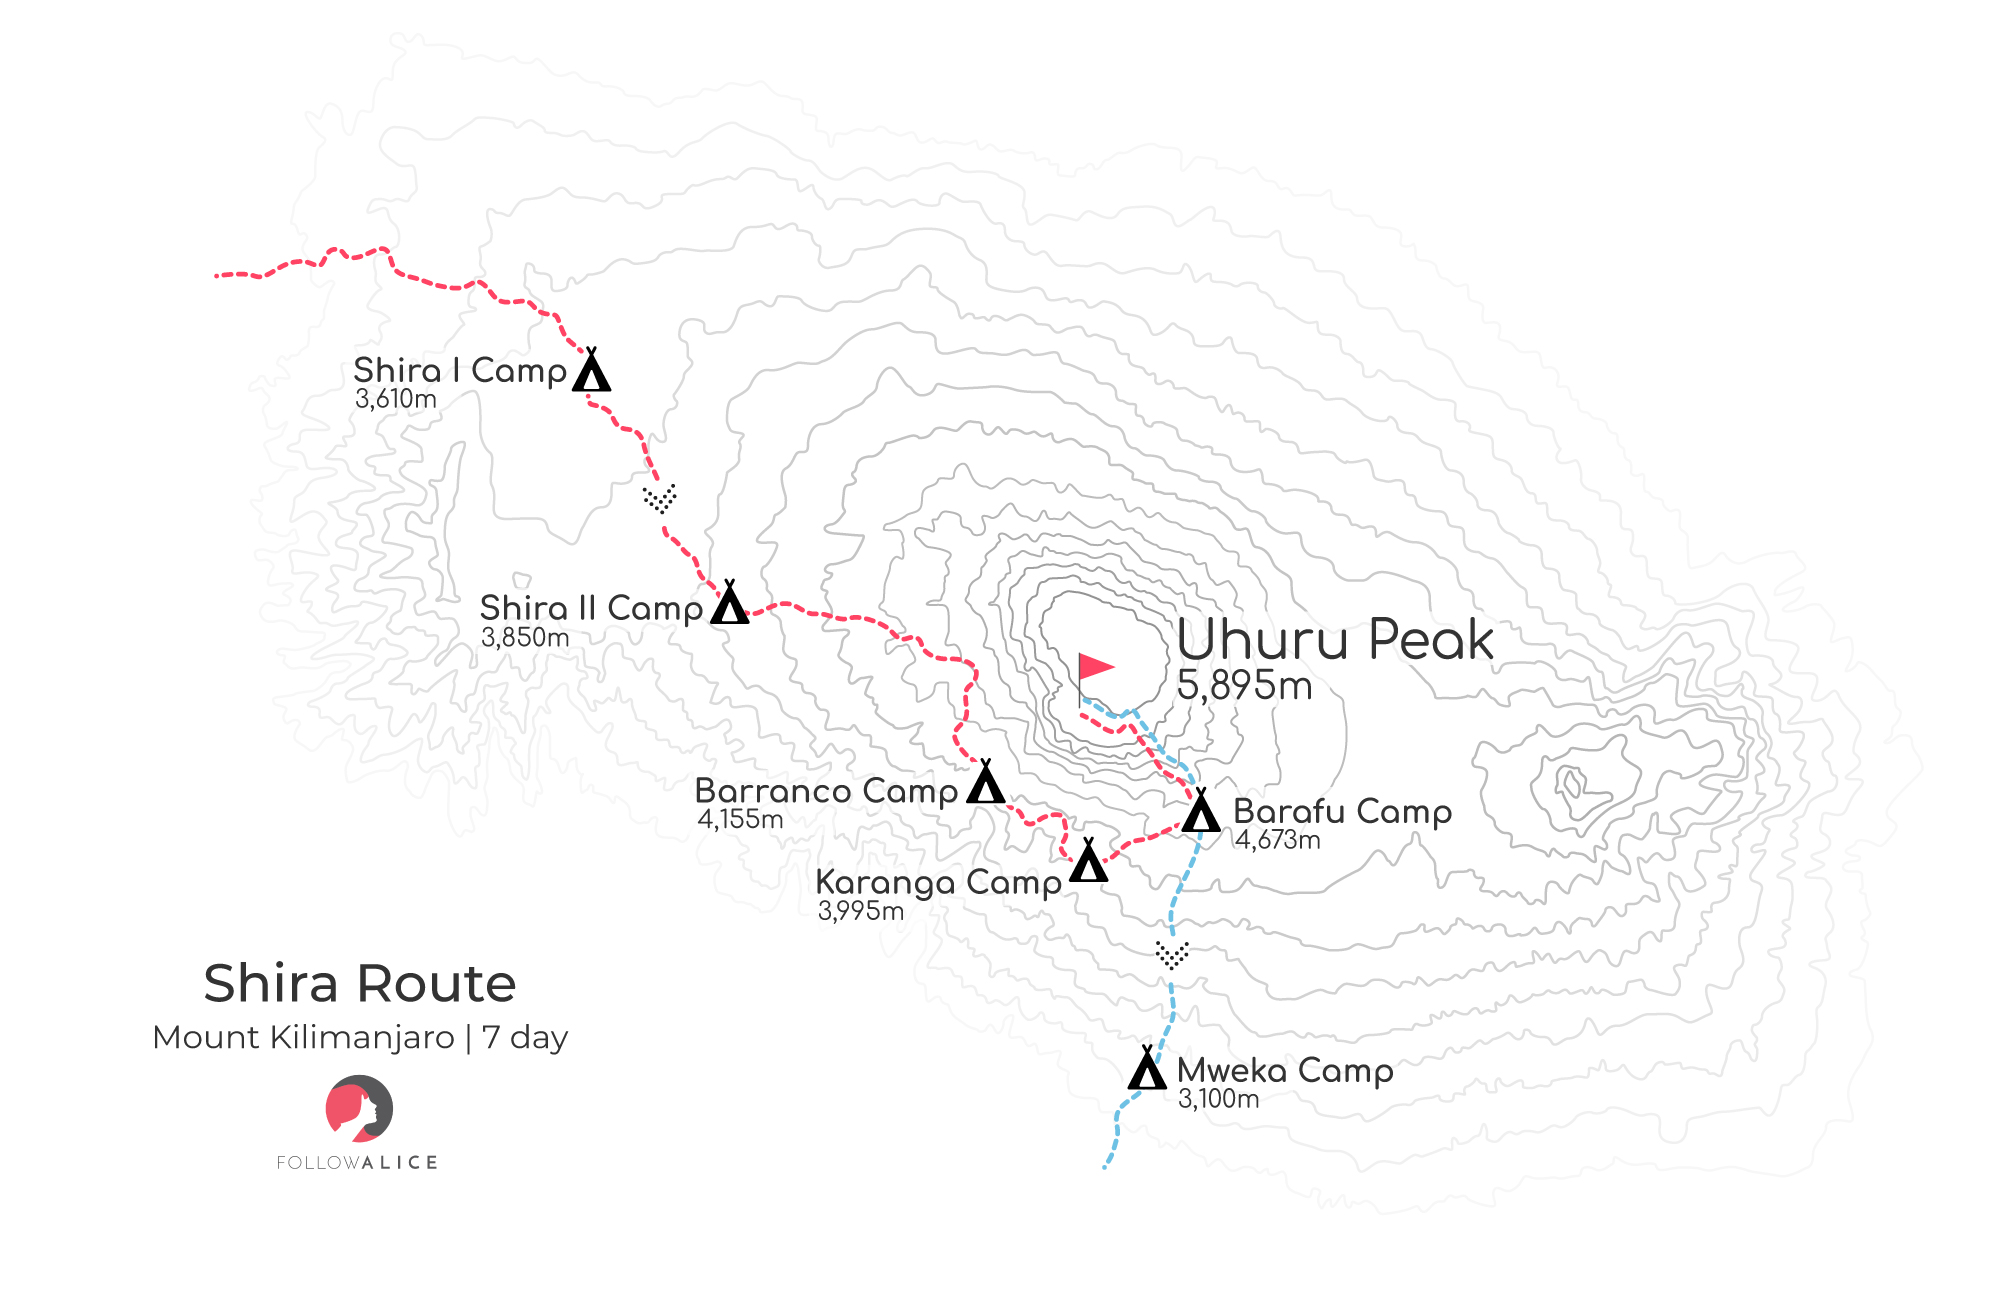
Map showing Kilimanjaro's Shira route
Day 1: Morum Barrier to Shira 1 Camp
Today you're driven to Londorossi Park Gate, where you're entered in the registry of the Kilimanjaro National Park. You're then driven quite a ways to Morum Barrier. Your climb begins here, and you trek through heath and moorland to arrive at Simba Camp, where you stay for the night.
- Elevation: 3,414 m to 3,500 m
- Distance: 4 km / 2 miles
- Hiking time: 2 hours
- Habitat: Moorland
Day 2: Shira 1 Camp to Shira 2 Camp
Today your trek takes you past beautiful moorland rock formations and across volcanic rock plateaus. You also cross Shira Cathedral, which is one of the three peaks of Kilimanjaro. Tonight you stay at Shira 2 Camp.
- Elevation: 3,505 m to 3,847 m
- Distance: 6 km / 4 miles
- Hiking time: 4-5 hours
- Habitat: Moorland
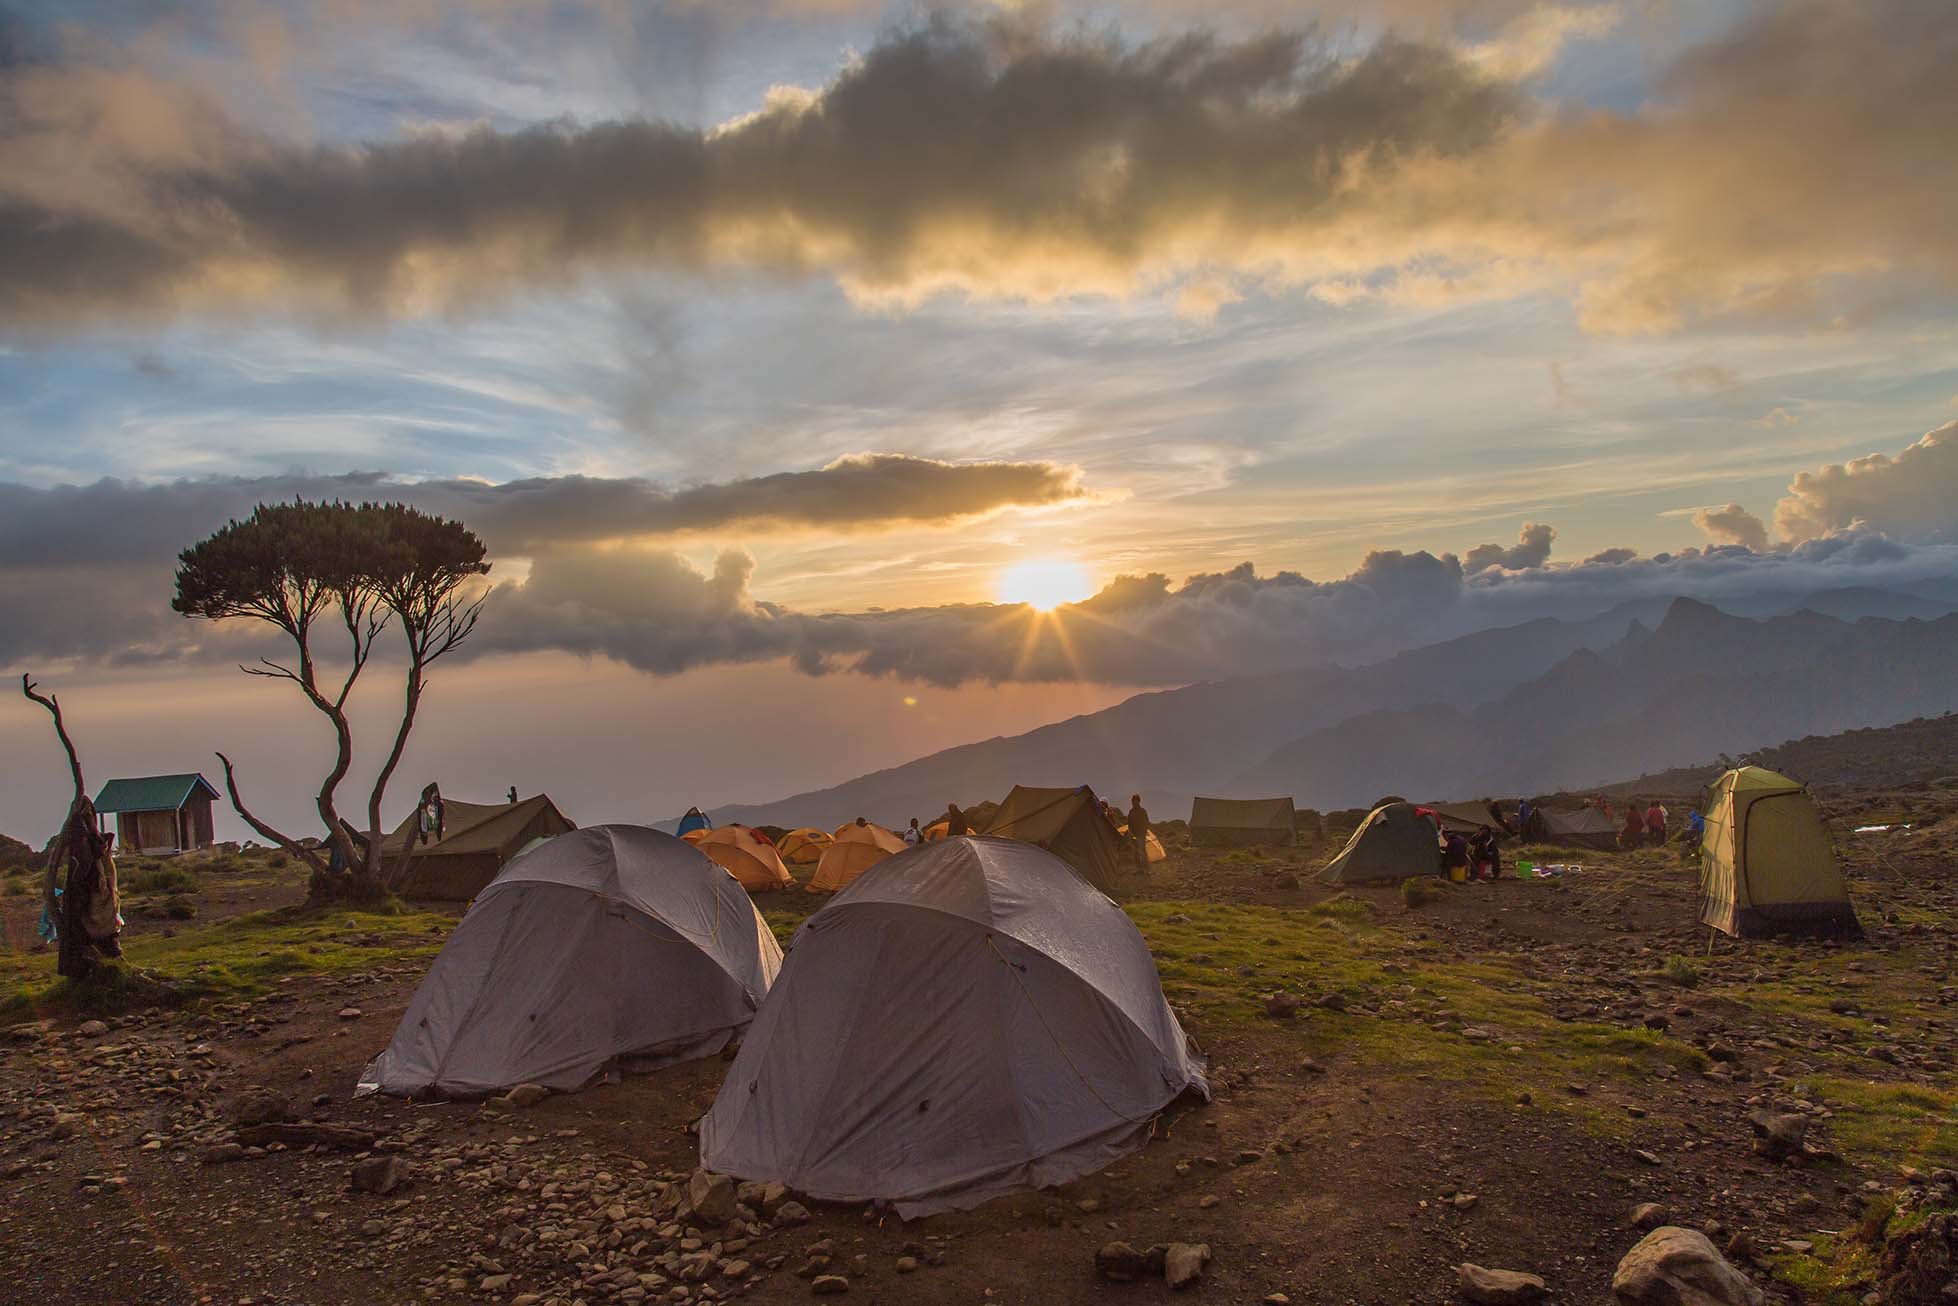
Shira 2 Camp with a gorgeous sunset
Day 3: Shira 2 Camp to Lava Tower to Barranco Camp
Today's trek consists of two parts: the climb to Lava Tower, followed by the descent to Barranco Camp. This plan is in keeping with the 'climb high, sleep low' strategy that allows for good acclimatisation.
Part 1 | Shira 2 Camp to Lava Tower
- Elevation: 3,847 m to 4,630 m
- Distance: 8 km / 4 miles
- Hiking time: 4-5 hours
- Habitat: Moorland
Today you hike up to the impressive rock formation called Lava Tower at 4,630 m (15,419 ft) above sea level. It takes four to five hours to get there and is a true highlight of the entire Kilimanjaro trek.
Part 2 | Lava Tower to Barranco Camp
- Elevation: 4,630 m to 3,976 m
- Distance: 3 km / 2 miles
- Hiking time: 2-3 hours
- Habitat: Moorland
After lunch at Lava Tower, you head down to Barranco Camp, a hike that takes about two to three hours. The campsite is located in a valley below the Western Breach and great Barranco Wall.

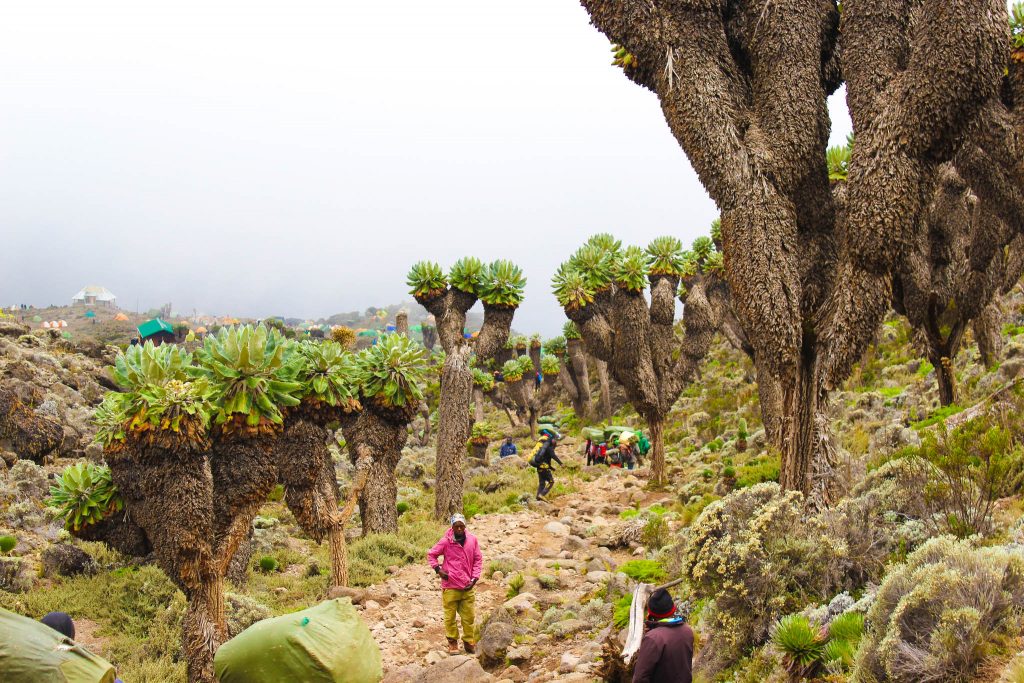
You trek through dramatic landscapes on the Shira route
Day 4: Barranco Camp to Karanga Camp
This is a short hiking day of four to five hours that's focused on helping you to acclimatise. After an early morning breakfast, it’s time for you to conquer Barranco Wall. Although it may look intimidating at first, trekkers usually report that it turned out to be much easier than they anticipated.
At the top of the wall, you're above the clouds and enjoy superb views of the Southern Ice Fields and the summit. The trail then winds up and down until you arrive at Karanga Camp.
- Elevation: 3,976 m to 3,995 m
- Distance: 5 km / 3 miles
- Hiking time: 4-5 hours
- Habitat: Moorland and alpine desert
Day 5: Karanga to Barafu Camp
It’s getting real! You’re now very close to the summit and have some amazing views of the mountain during your ascent of just three hours to reach Barafu Camp, which sits at 4,600 m (15,091 ft). An early dinner is served so you can get some rest before attempting the summit that same night. Before you go to bed, your guide briefs you in detail on how best to prepare for summit night.
- Elevation: 3,995 m to 4,673 m
- Distance: 4 km / 2 miles
- Hiking time: 3 hours
- Habitat: Alpine desert
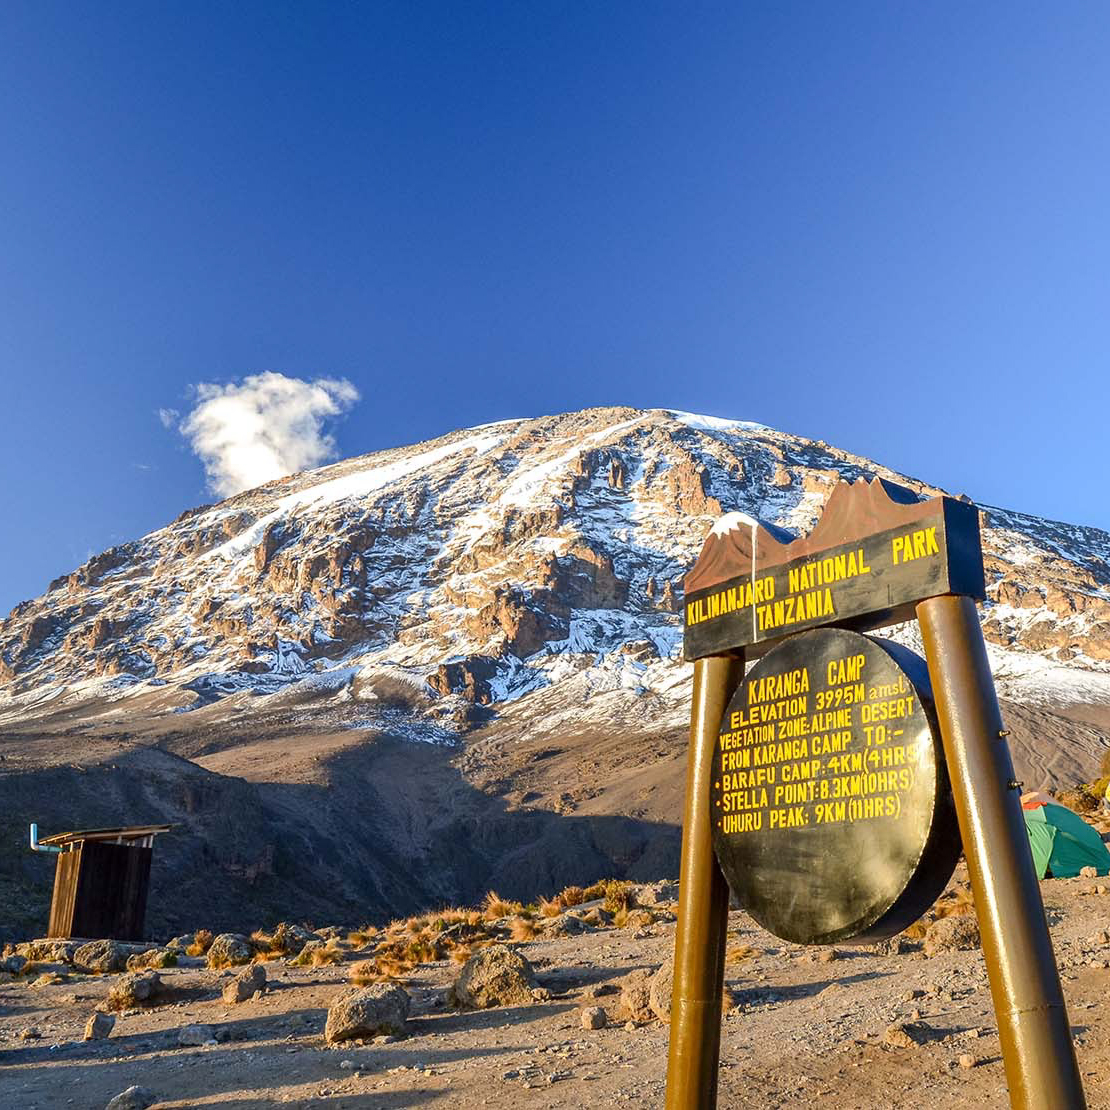
Karanga Camp sign
Day 6: Barafu Camp to Uhuru Peak to Mweka Camp
Today is summit day! It's time for the big push – to dig deep for everything you have to make it to the summit.
Part 1 | Barafu Camp to Uhuru Peak
- Elevation: 4,673 m to 5,895 m
- Distance: 5 km / 3 miles
- Hiking time: 6-8 hours
- Habitat: Arctic
The route ascends northwest into the dark night, and you walk over stone scree. In about six to seven hours, you reach Stella Point on the crater rim, which sits at 5,685 m (18,651 ft) above sea level. It should be around sunrise at this point. You then continue for an hour or so on a sometimes snow-covered trail before reaching Uhuru Peak, which is 5,895 m (19,341 ft) above sea level. Uhuru Peak is the highest point in Africa! Be prepared to be overwhelmed by your accomplishment and the magnificent views!

Uhuru Peak!
Part 2 | Uhuru Peak and back down to Mweka Camp
- Elevation: 5,895 ft to 3,068 ft
- Distance: 12 km / 7 miles
- Hiking time: 6-8 hours
After reaching the summit, you descend to Mweka Camp at 3,110 m (10,204 ft) above sea level. Here you spend your final night on the mountain after having hiked for about 12 to 16 hours today!

Snap by Frederik Mann of Mweka Camp in the evening
Day 7: Mweka Camp to Mweka Gate
Today you do the last bit of hiking down to the foot of the mountain, where your driver meets you at Mweka Gate. Time for a beer and great celebration dinner!
- Elevation: 3,068 m to 1,640 m
- Distance: 10 km / 6 miles
- Hiking time: 3 hours
- Habitat: Rainforest

A section of the Mweka descent route
Our opinion of the Shira route
Along with its cousin the Lemosho route, the Shira route has all of the qualities you could ask for in a Kilimanjaro climb, including beautiful views and varied terrain throughout. The Shira route does, however, start at an unhelpfully high altitude. This means that climbers tackling the Shira route are at a higher risk of developing altitude-related symptoms from the first day.
Further to this, we feel it's a pity that the Shira route trekkers miss hiking through the beautiful rainforest band.
For both of the above reasons, we recommend opting for the Lemosho route over the Shira route. Remember that the Lemosho is an extended version of the Shira that starts about a kilometre lower in the rainforest. So if you do the Lemosho you see all of the same scenery as on the Shira, but you also hike through the gorgeous rainforest band. Furthermore, on the Lemosho you give your body sufficient time to acclimatise properly, and in so doing increase your chances of managing to actually stay healthy enough to summit the mountain!
That said, we're happy to recommend the Shira route to anyone who is a seasoned high-altitude trekker, has just done some pre-acclimatisation, or lives at a high altitude that's similar to that of the route's starting point.
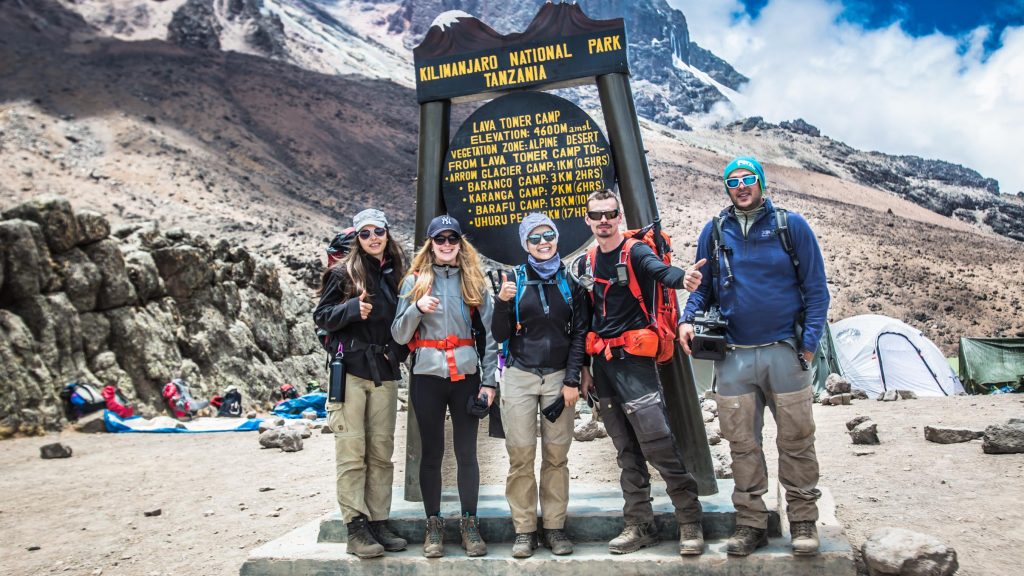
All smiles at Lava Tower Camp
What is the scenery like?
Along with the Lemosho route, the Shira route is known for being one of the most beautiful Kilimanjaro routes. The spectacular western approach offers trekkers the experience of hiking across Shira Plateau, which is one of the largest high-altitude plateaus in the world. It also offers fantastic views of Shira Cathedral, a dramatic buttress of rock.
The Shira route also offers some of the best sunrises and sunsets on Kilimanjaro. And when you descend via the Mweka route, you trek the southeastern slope of the mountain, so you get to see a completely different side of Kilimanjaro to that which you ascended.
One of the downsides of the Shira route is that you miss out on hiking through the truly beautiful and rather wild section of the rainforest that those hiking the Lemosho get to experience. That said, you do experience some of the rainforest on your last day of trekking, as the Mweka route brings you down into the forest band.
The scenery along the Shira route is just gorgeous
How hard is the Shira route?
No Kilimanjaro climb is easy, but the Shira route is one of the hardest climbs given that it starts at such a demanding altitude, namely 3,414 m above sea level. This means that a relatively high number of trekkers fall victim to the effects of altitude right out of the gate. (You want to start hiking well below the 3,000 m to best avoid developing altitude sickness.) The Shira route therefore doesn't have a very encouraging summit success rate, meaning only a relatively low percentage of trekkers using this route actually manage to reach Uhuru Peak.
The Shira route can be completed in either six or seven days. The extra day gives you more time to acclimatise, making it the slightly easier option.
Given that the Shira route skirts the southern slope of Kilimanjaro, you must scramble up Barranco Wall on this route. This is a short but steep section that those who are fearful of heights might wish to avoid. We recommend the Northern Circuit or Rongai route for anyone nervous about heights since these don't include Barranco Wall.
Barranco Camp sits near the base of Barranco Wall
A good aspect of the Shira route is that on Day 3 you climb up to Lava Tower and then drop down nearly 600 m to Barranco Camp for the night. Introducing your body to an all-new altitude and then letting it recover overnight at a lower altitude is very helpful for your body's acclimatisation process. So if you can cope with the high starting altitude of the Shira trek, you're then on a good trail for further acclimatisation.
Finally, we must point out that the Shira is the second shortest route after the Umbwe. So in one sense it's easier than some of the other ascent routes since you don't have to trek so far and for so long. But the acclimatisation issue arising from its high starting elevation far outweighs the matter of distance. So unless you've done some sort of pre-acclimatisation (like you climbed neighbouring Mt Meru), we would say that the Shira route vies with the Umbwe route for the title of the hardest Kilimanjaro route.
How busy is the Shira route?
The Shira route is a quiet route on the first two days. After that, it starts merging with other routes and becomes a busy route. First you join trekkers hiking the Lemosho route on the evening of Day 2 at Shira 2 Camp, and then those hiking the Machame route on Day 3 near Lava Tower. This is when the crowds can get a little bigger in peak season.

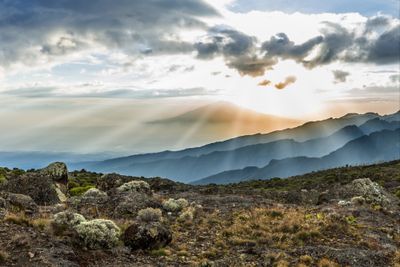
A quiet moorland section of the Shira route trail
Why not add a post-Kili adventure onto your trip?
If you want to add a little more adventure onto the end of your Kilimanjaro climb, we recommend going on a Big Five Tanzania safari, hopping over the border into Uganda to trek with mountain gorillas, or plonking yourself on a white-sand beach in Zanzibar!
Alternatively, if you've limited time and budget, why not do one or two extra activities in the Kilimanjaro region like go on a big-game drive in Arusha National Park?

Ngurdoto Crater in Arusha National Park is a lush oasis for wildlife