


So you want to climb Mera Peak?
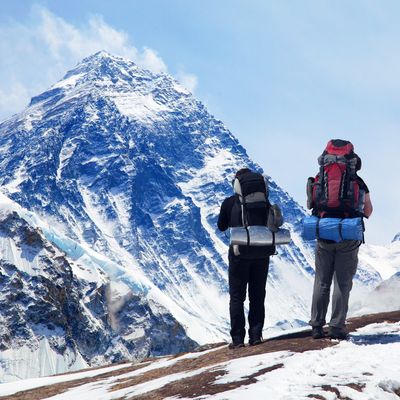
If you’ve dreamed of reaching a Himalayan summit without needing ropes or ice-climbing skills, this is your shot. Climb Mera Peak for an unforgettable mix of remote trekking, glacier travel, and epic high-altitude views — no mountaineering experience required.
This guide breaks down everything you need to know about the Mera Peak climb, including altitude facts, what the route looks like, and what to expect on summit day.
What is Mera Peak?
Mera Peak is the highest trekking peak in Nepal, standing at 6,476 m (21,247 ft). It’s located in the Mahalangur Himal section of the Himalayas, southeast of Mount Everest, in Nepal’s Sankhuwasabha District within the Sagarmatha Zone. For context, the term “trekking peak” is just a permit category used by the Nepal Mountaineering Association, and it doesn’t tell you much about what the climb will actually be like.
Mera Peak might not be a technical beast, but it’s no walk in the park either. This trek is a proper high-altitude adventure. You’ll be roped up for glacier travel, crunching over ice in crampons, and tackling a short but steep fixed rope section near the summit — added recently thanks to shifting crevasses. It’s graded alpine PD (peu difficile), which means it’s not extreme, but demanding. You don’t need to be a skilled mountaineer, but this isn’t one to underestimate. Come prepared, take it seriously, and you’ll earn every step of that summit view
The mountain has three main summits:
- Mera North – 6,476 m (21,247 ft)
- Mera Central – 6,461 m (21,198 ft)
- Mera South – 6,065 m (19,898 ft)
Most climbers head for Mera Central, though Mera North is the true summit. Either way, both involve the same general ascent and experience.
Why climb Mera Peak?
1. Summit views of five 8,000-meter peaks
From the Mera Peak summit, you get a rare panoramic view of five of the world’s tallest mountains:
- Mount Everest (8,848 m / 29,029 ft) – Towering above all, 22 km away to the north.
- Lhotse (8,516 m / 27,940 ft) – Just south of Everest, with a dramatic ridgeline.
- Makalu (8,485 m / 27,838 ft) – To the east, often shrouded in cloud.
- Cho Oyu (8,188 m / 26,864 ft) – West of Everest, rising like a fortress.
- Kangchenjunga (8,586 m / 28,169 ft) – Far off in the east, Nepal’s second-highest.
Few trekking peaks offer a reward like this. On a clear morning, you’ll watch sunrise hit the biggest peaks on Earth.
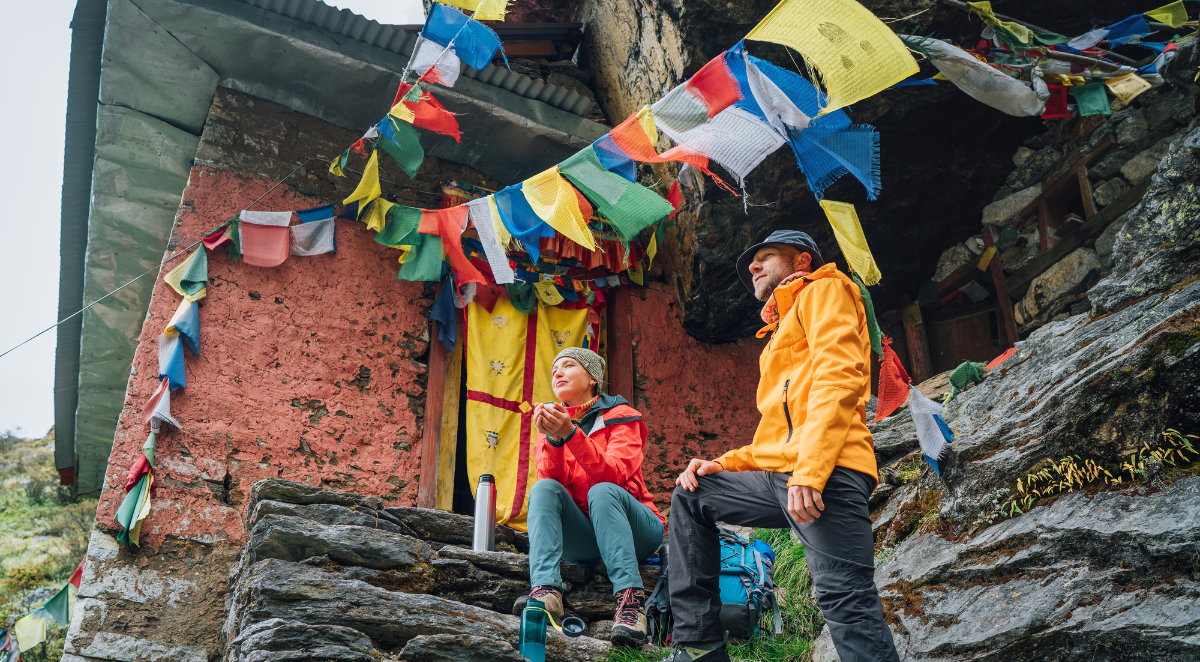
2. Real trekking through Sherpa culture
Unlike the busier Everest Base Camp route, the trail to Mera feels remote. You’ll pass through villages like Pangom and Khote, cross suspension bridges over glacial rivers, and spend nights in basic teahouses.
This is Sherpa country, and the cultural immersion is real. You'll see mani walls, prayer flags, and ancient Buddhist monasteries, all surrounded by wild Himalayan terrain.
What the Mera Peak climbing experience is really like
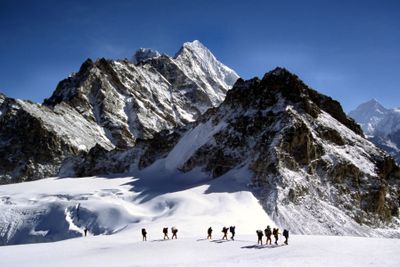
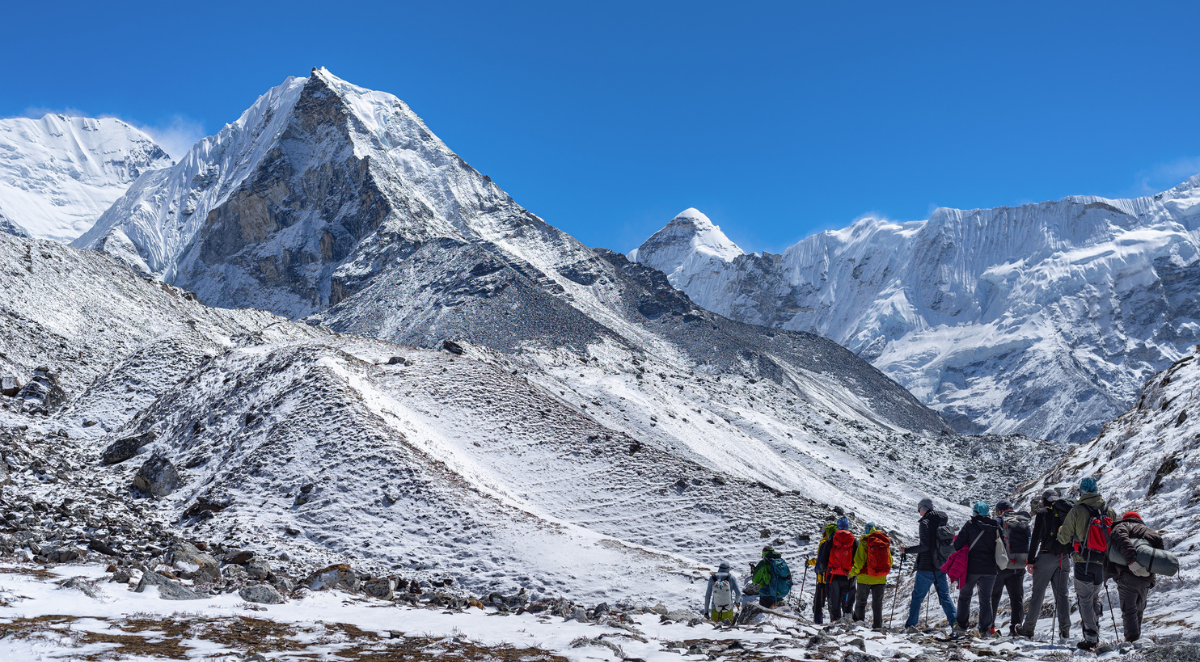
The trek: forests, ridgelines, and glaciers
Most Mera Peak expeditions start with a short flight from Kathmandu to Lukla. From there, the route heads southeast, diverging from the Everest trail toward quieter paths.
Over 10–12 days, you’ll hike through:
- Rhododendron and pine forests
- Bamboo-filled valleys
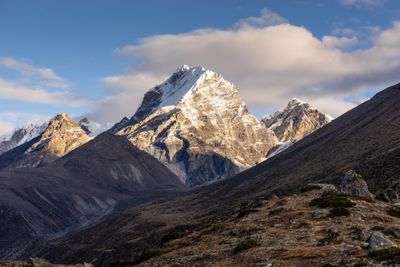
- Alpine meadows
- High-altitude yak pastures
- Snow-covered ridgelines and glacial basins
Daily distances vary between 5 to 15 km (3 to 9 mi), depending on the itinerary and acclimatisation needs.
The summit push: cold, dark, and unforgettable
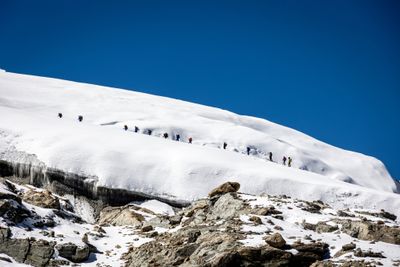
Summit day starts early — usually between 2:00 and 3:00 a.m. You’ll leave high camp by headlamp, walking roped up across the Mera Glacier.
It’s a steady, slow climb with gentle slopes and a few steeper sections. Most climbers reach the Mera Peak summit around sunrise. The final push may feel brutal due to thin air, but the views from the top? Worth every step.
Once you’re standing at 6,476 m (21,247 ft) with Everest, Lhotse, and Makalu on the horizon, you’ll understand why so many adventurers are drawn to Mera Peak climbing.
Preparing for the climb
So you want to climb Mera Peak? Here’s how to prepare like a pro.
Deciding to climb Mera Peak is a big deal — and a fantastic one. This isn’t your average Himalayan trek. It's a true high-altitude expedition that tests your endurance, resilience, and gear. With smart prep and the right kit, the Mera Peak summit is well within reach for fit, determined trekkers.
Let’s walk through how to train, pack, and plan so you’re fully ready to take on Mera Peak climbing in Nepal.
How to train for Mera Peak climbing
You don’t need to be a mountaineer, but you do need to be fit
Climbing Mera Peak isn’t about ropes or rock walls. The challenge lies in the thin air, cold mornings, and long days of steady hiking, often at altitudes over 5,000 m (16,404 ft). Most routes take 12–18 days, so your physical preparation needs to match the demands.
Here’s a breakdown of what your training should include:
Mera Peak fitness checklist
- Cardio is king – Aim for 4–6 days a week of activities like hiking, running, cycling, or swimming. Focus on building endurance over speed.
- Strength training matters – Prioritise legs, core, and back — these muscle groups carry you and your pack up the trail. Think squats, lunges, deadlifts, and planks.
- Stair climbing with a loaded backpack – Simulate the trail by hiking up stairs or hills with 8–12 kg (18–26 lb) on your back. It builds the stamina you’ll need for summit day.
- Altitude simulation (if available) – Consider hypoxic tents, altitude masks, or training at elevation if you can. While not required, it helps your body adjust before you even leave home.
- Weight training - Focus on weighted hikes carrying a 10–12 kg pack, ideally over several consecutive days with at least 1,000 metres of elevation gain. This mimics the kind of sustained uphill effort you'll face on the mountain, especially on summit day, when fatigue kicks in.
- Don’t skip downhill training - It’s easy to overlook, but the descent can be just as tough as the climb. After 6,000 metres, your quads and knees will feel every step down. Include downhill hiking and exercises that strengthen your joints and lower body; your knees will thank you later.
- Train for back-to-back days - Try to simulate trekking for two or three long days in a row. It’s not just about physical endurance; it helps you fine-tune your layering, recovery routine, and how your body handles fatigue while carrying a full pack.
- Get comfortable with basic mountaineering skills - If possible, get some hands-on practice with crampons, ice axes, rope travel, and jumaring (ascending a rope). While you'll get a refresher at Khare, it makes a difference to already be familiar with the gear. A short alpine skills course is ideal, but even watching YouTube tutorials and practising on local snowy terrain can help you feel more confident on summit day.
- High-altitude experience - Before setting your sights on Mera Peak, it’s important to have some high-altitude experience under your belt, ideally above 5,000 metres. This helps your body acclimatise more effectively and gives you a better sense of how you respond to altitude. Trekking other summits like Everest Base Camp, Mount Kilimanjaro, or some similar climb is great for preparation. Mera isn’t overly technical, but it is high, and that’s what makes prior altitude exposure important. Think of it as setting yourself up for success, so you can enjoy the climb and maximise your chances of summiting.
Follow Alice's Puru Sharma, who recently trekked Mera Peak, says:
"People underestimate how physically and mentally exhausting a 6,400 m+ peak is, especially over multiple days. If this is your first time going above 5,000 m, consider building up with another high-altitude trek first."
How long before should you train?
Start preparing at least three months before your expedition. If you’re coming from a lower fitness base, give yourself closer to six.
Remember: the better shape you’re in, the more energy you’ll have to actually enjoy the climb. For an in-depth guide on how to train for Mera Peak climbing, click here.
What to pack for the Mera Peak climb
The right gear makes all the difference
Packing for Mera Peak climbing in Nepal means preparing for everything from warm valley trails to subzero summit nights. Conditions can swing fast, and staying warm, dry, and safe is essential when you're pushing past 6,000 m (19,685 ft). Here’s a practical checklist with everything you need to bring (and what you can rent once you land in Kathmandu).
Clothing: Layer smart and light
- Base layers – Moisture-wicking thermals (merino wool or synthetic)
- Insulation – Fleece or lightweight down mid-layer
- Outer shell – Waterproof, windproof jacket and pants (Gore-Tex or similar)
- Down jacket – One rated to at least -20°C (-4°F) for summit day
- Gloves – Liner gloves + warm insulated outer gloves
- Hat + balaclava – Essential for cold nights and windy mornings
- Gaiters – Keeps snow out of your boots on higher sections
Footwear: Don’t skimp on boots
- Trekking boots – Waterproof, worn-in, and warm
- Mountaineering boots – Insulated double boots (required for summit day)
- Camp shoes – Lightweight slip-ons for tea house evenings
Technical gear: You won’t use it much, but you’ll be glad you have it
- Crampons – Must fit your mountaineering boots
- Ice axe – Used for balance and safety, not vertical climbing
- Climbing harness, jumar, and carabiners – Often provided by guiding companies
- Helmet – Lightweight climbing helmet for glacier travel
Essentials: The gear you’ll use every day
- Sleeping bag – Rated to -15°C to -20°C (5°F to -4°F)
- Daypack – Around 35 litres, with room for water, snacks, layers
- Duffel bag – 70–90 litres; carried by yaks or porters
- Trekking poles – Adjustable, with snow baskets
- Headlamp – With extra batteries (cold drains power fast)
- Water bottles or hydration system – With insulated covers
- Electrolytes + snacks – Your summit fuel
- Sunglasses + high-SPF sunscreen – Glacier sun is no joke
- Basic first-aid kit – Include altitude meds, band-aids, and personal meds
Rent vs. bring: What to buy at home, what to pick up in Nepal
All the technical climbing gear you need is provided by Follow Alice, so there's no need to rent anything in Kathmandu — unless you prefer using your own. This includes high-quality insulated double boots, crampons, a helmet, a harness, a jumar, and an ice axe.
But bring your own:
- Base layers and socks
- Gloves and hats (fit and warmth vary too much)
- Sunglasses and a headlamp
- Broken-in trekking boots
- Any critical medication or personal hygiene items
We suggest REI or Amazon to complete your packing list for peak climbing in Nepal.
Importance of acclimatisation
Altitude is the sneaky villain of every Mera Peak climb. It's not the cold or the terrain that'll knock the wind out of you first—it's the lack of oxygen. You can’t see it, you can’t fight it, and no, you can’t power through it. You have to acclimatise. It’s not optional. It’s survival.
What is acclimatisation?
Think of acclimatisation as your body learning how to breathe all over again—but with about half the oxygen it’s used to. As you ascend, the air thins. Your lungs get less O₂, your muscles complain, and your brain might start firing off warning signs indicating altitude sickness.
Proper acclimatisation gives your system time to catch up, so you’re not the one lying in a tent with a splitting headache while your team eyes the summit.
Symptoms of AMS: aka your body waving a red flag
Acute Mountain Sickness isn’t scary-sounding for no reason. It will destroy your summit chances if ignored. Watch out for:
- A headache that doesn’t go away after drinking water or resting
- Nausea or feeling “off”
- No appetite, even for that Snickers bar you’ve been saving
- Dizziness or extreme fatigue
- Shortness of breath when you’re not even moving
You’ll probably feel something at some point. The trick is knowing when it’s minor—and when it’s your body shouting “Abort mission!”
How to beat altitude
You can’t out-fitness altitude. No one’s lungs are that strong. But if you’re smart, you can outpace it. Here’s how to give yourself the best shot at standing on that Mera Peak summit without needing to be carried back down:
- Climb high, sleep low: This tried-and-tested method helps your body adjust without overdoing it.
- Hydrate like your life depends on it—because it does. Aim for 3 to 4 litres a day, minimum.
- No alcohol, no sleeping pills: Save the celebration until you’re back at Lukla.
- Slow down: This is not the time to channel your inner trail runner. Take it slow, take breaks, and don’t race ahead.
- Plan acclimatisation days: Smart itineraries include 1–2 rest days around Khare before your final push. That’s not slacking—it’s strategy.
- Diamox is your backup: Talk to your doctor before your trip. If they give you the green light, this little pill can help your body adapt more easily.
Respect the mountain. If you don’t, altitude will absolutely make you regret it.
Trekking routes to Mera Peak
There’s more than one way to climb Mera Peak, and each route brings its own flavour of challenge and scenery. Your choice mostly depends on how much time you’ve got, how your body handles altitude, and whether you like being around people, or far, far away from them.
Classic route: Fast, tough, popular
Duration: ~14–18 days Route: Lukla → Chutang → Zatrwa La Pass → Kote → Tangnag → Khare → High Camp → Mera Peak summit
This is the direct line. It’s the shortcut. After landing in Lukla, you hit the Zatrwa La Pass within the first few days. It’s steep, no-nonsense, and gets you into Mera territory quickly.
Pros
- Shaves days off your Mera Peak climbing schedule
- Ideal for trekkers who’ve been at altitude before and want a challenge
- Feels more “expedition” than “leisure hike”
Cons
- Early elevation gain = higher AMS risk
- Zatrwa La is no joke—especially on tired legs
- Less time to enjoy the scenery (or breathe while doing it)
If you’ve already bagged a few Himalayan summits, this route will feel familiar: fast, intense, and efficient. If you haven’t? Maybe keep reading.
Alternative route: Scenic, slower, smarter
Duration: ~18–21 days Route: Lukla → Paiya → Panggom → Ningsow → Cholem Kharka → Kothe → Tangnag → Khare → High Camp → Mera Peak summit
This is the long game—and the smarter move if you’re serious about reaching the top without an AMS horror story. You avoid Zatrwa La completely, and instead ease your way through remote, forested hills and ridgelines most trekkers never see.
Pros
- Way better for acclimatisation
- Quieter trails and big nature energy
- Gives your body a fighting chance at summit success
Cons
- Requires more time (and money)
- Longer days can feel endless if you’re not mentally prepped
- Remote = fewer lodges, more rustic tea houses
This is the route we recommend for most people, especially first-timers. The longer, scenic approach sets you up for a safer and more enjoyable Mera Peak climb, even if it does take a few extra days.
Why the longer route to Mera Peak is the smart choice
When planning your Mera Peak adventure, the longer, more scenic route should be your go-to, especially if you're new to high altitude. While the direct trail via Zatrwa La might look appealing on paper, it gains elevation quickly and gives your body little time to adjust. That steep early ascent can significantly raise your risk of altitude sickness.
The alternative route winds more gradually through the Hinku Valley, with rest days built in at Thangnak and Khare. You’ll also have a valuable acclimatisation window at High Camp before the summit push. It’s not just more scenic, it’s far smarter from a health and safety perspective.
Proper pacing and planned acclimatisation stops make a huge difference. Teams following the gradual route see summit success rates of 80–90%. In contrast, those who rush the ascent often see that number drop to 40% or less. If you want the best chance of standing on the summit and enjoying the journey along the way, taking the longer route isn’t just advisable, it’s essential.
Suggested itineraries for Mera Peak climbing
- Day 1: Kathmandu – Land in the capital. Settle into the Thamel chaos. Later, gear gets checked, dinner gets eaten, and plans get laid out.
- Day 2: Fly to Lukla, trek to Chutok (2,800 m) – Mountain flight. Bit bumpy, maybe. Trek kicks off with forest paths, not too hard. The village at the end is quiet. 3–4 hrs.
- Day 3: Trek to Pangkoma (2,846 m) – Up through farmland. Rhododendrons, small hamlets, a slow, steady climb. Legs feel it by evening. 5–6 hrs.
- Day 4: Trek to Ningsow (2,846 m) – Pass over Pangkongma La. Drop into the Hinku Valley — remote, wild. Mera shows itself. 5–6 hrs.
- Day 5: Trek to Chhatra La (2,800 m) – Forest, ridges, and air that gets thinner. Trails are less busy here. Keep climbing. 6–7 hrs.
- Day 6: Trek to Kothe (3,691 m) – Along the river now. Fir and bamboo close in. Peaks ahead start looking serious. 6–7 hrs.
- Day 7: Trek to Thaknak (4,358 m) – Above tree line. Yak pastures, loose rock, big skies. Shorter day, but altitude kicks in. 4–5 hrs.
- Day 8: Acclimatisation in Thaknak – Stay put. Maybe walk to Sabai Tsho lake.
- Day 9: Trek to Khare (5,045 m) – Glacier follows on the right. Khare sits up high — the last proper place before the summit push. 5–6 hrs.
- Day 10: Training day – Rope work, crampon drills, ice axe stuff. Guides run the show. Practice matters.
- Day 11: Trek to High Camp (5,780 m) – Ridge climb. Camp clings to the slope. Not much air up here. Views? Unreal. 5–6 hrs.
- Day 12: Summit day (6,461 m), return to Khare – Early start, long day. Cold, slow, stunning. Reach the top, then down, all the way to Khare. 8–10 hrs.
- Day 13: Spare day – In case the mountain says “not yet.” It could be used anywhere, really.
- Day 14: Trek to Kothe (3,691 m) – All downhill now. Forests come back. Knees work overtime. 5–6 hrs.
- Day 15: Trek to Chhatra La (2,800 m) – Up and over again. Feels familiar, still beautiful. 6–7 hrs.
- Day 16: Trek to Lukla (2,860 m) – Final stretch. Everyone’s tired. A cold drink waits at the end. 7–8 hrs.
- Day 17: Fly to Kathmandu – Morning flight. Clouds depending. Back to city noise, warm showers.
- Day 18: Depart – Airport run. Maybe a last masala tea. That’s it.
Until next time — dhanyabad!
What summit day is really like
The final push on your Mera Peak climb starts in the dead of night. Most teams leave High Camp (5,780 m / 18,963 ft) around 2 or 3 a.m. — not because it’s fun to wake up early, but because the conditions are cold, stable, and less windy before sunrise. It also gives you the best shot at reaching the summit safely and descending in daylight.
Here’s how it unfolds:
1. Pre-dawn start
It’s freezing. You’ll gear up in layers, strap on your crampons, and grab a headlamp. A light breakfast (usually porridge, tea, and biscuits) is all you’ll manage. Adrenaline does the rest.
2. The climb begins
The ascent is slow, steady, and steep. You’ll move roped up in small groups, trekking across a vast glacier with a gentle incline at first. As altitude increases, every step gets harder — not because the trail is technical, but because the air is painfully thin.
3. The final ridge
Just before the summit, you’ll hit the steepest section: a snow-covered slope where you’ll need your ice axe, crampons, and focus. It’s short, but demanding. Your guides will fix ropes if needed. It’s all about staying calm and following their lead.
4. Reaching the summit (6,476 m / 21,247 ft)
When you finally step onto the summit of Mera Peak, the world opens up. On a clear day, you’ll see five of the six highest mountains on Earth. It's a rare 360-degree view that few trekking peaks in Nepal can offer.
Staying safe on your Mera Peak climb
Climbing Mera Peak in Nepal isn’t a technical mountaineering expedition, but it’s still serious. You're dealing with real altitude, unpredictable weather, and remote terrain. That’s why smart preparation — and climbing with an expert team — makes all the difference. Recent summit conditions require a short fixed rope section near the top, adding a mild technical element to an otherwise straightforward glacier ascent.
1. Always go guided
Professional guides are trained in altitude management, rescue protocols, and weather assessment. They’ll handle route decisions and summit timing, letting you focus on one thing: climbing safely.
2. Respect the altitude
Mera Peak climbing means spending days above 5,000 meters (16,404 feet). You’ll follow a gradual acclimatisation plan, drink plenty of water, and ascend slowly — but listen to your body. If symptoms of AMS show up (headache, nausea, dizziness), don’t ignore them.
3. Watch the weather
The window to summit Mera Peak safely is narrow. April–May and October–November are your best bets. Even then, high winds or sudden snow can change everything. Your guides will always prioritise safety over schedule.
4. Stick with your team
Never wander off. It’s easy to lose your bearings in whiteout conditions or on a glacier. Staying roped together and following your team’s pace is key — both for navigation and for morale.
5. Know your limits
It’s tempting to push hard, especially when the summit’s in sight. But smart climbers know when to turn back. Success is getting up and down in one piece, not risking it all for a photo.
Cultural aspects during the trek
Climbing Mera Peak isn’t just a high-altitude achievement—it’s a rare chance to walk through living Himalayan culture. Every step toward the summit brings you into closer contact with the Khumbu region’s rich traditions and the Sherpa people who call it home.
Interaction with local communities
Along the Mera Peak route, you’ll pass through remote mountain villages where life follows rhythms shaped by altitude, isolation, and Buddhism. Sherpas, known globally for their mountain expertise, aren’t just part of your climbing team—they’re your cultural guides.
You’ll experience:
- Villages like Chutanga, Tangnag, and Khare, where homes are built from stone, and firewood smoke drifts through the air.
- Prayer wheels, mani walls, and chortens, marking sacred spots and turning each trail into a spiritual journey.
- Warm welcomes and hot tea, offered by locals who live with the mountains, not just near them.
These aren’t tourist encounters—they’re real moments in real homes. And they stay with you long after the summit.
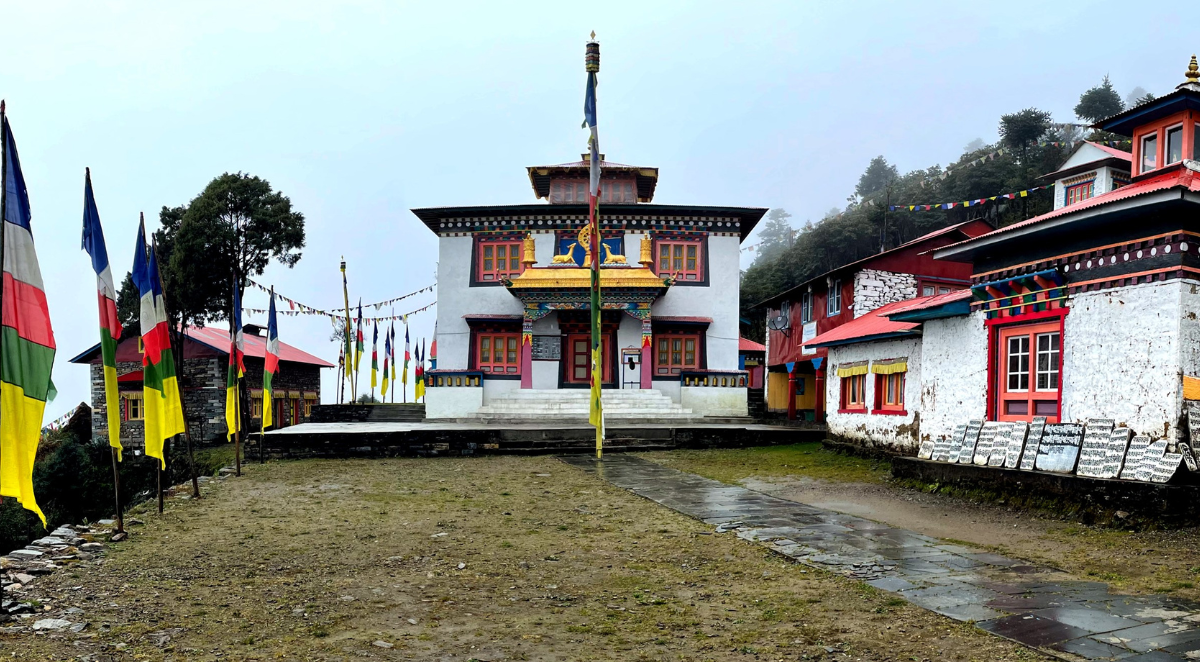
Cultural highlights of the Khumbu region
The Khumbu is deeply Buddhist, and you’ll feel it as you climb Mera Peak. Colourful prayer flags flutter over passes, carrying blessings skyward. Monasteries and shrines appear in the most remote places, inviting quiet reflection.
Keep an eye out for:
- Sagarmatha National Park – A UNESCO site that protects not only peaks but also endangered animals like the snow leopard.
- Hidden monasteries – Small gompas nestled in mountain folds, some visited only by the locals.
- Prayer flags and stupas – So common you might stop noticing them—until the wind lifts them just right.
This is what sets the Mera Peak climb apart: it’s not just high, it’s holy.
Final thoughts on Mera Peak climbing
Climbing Mera Peak is a challenge—but it’s also a journey through one of the most culturally rich regions in the Himalayas. The altitude tests you, but the people and traditions ground you. You came for the summit, but it’s the human side of the trek you’ll remember.
Planning to climb Mera Peak?
If you’re serious about Mera Peak climbing in Nepal, we’ve got you covered with an expertly guided tour that will allow you to enjoy the big highlights without sweating the small stuff. So, are you ready for the adventure of a lifetime?